How to Add a Google Trusted Source Button to Your WordPress Site


If you’ve been seeing bloggers add a “Google Trusted Source” button to their websites lately and wondering what it is and whether you need one, you’re in the right place. Adding a Google trusted source button to your site is genuinely one of the simplest things you can do — and yet somehow it has people completely overcomplicating it. So let’s clear that up and walk through exactly how to do it in just a few minutes.
What Is a Google Trusted Source Button, Anyway?
Before you add anything to your site, it helps to understand what you’re actually adding. Google has a feature that allows readers to tell Google they trust a particular news or content source. When someone clicks the button on your site, it signals to Google that your content is something they want to see more of in their feed and search results.
It’s a credibility signal, but it’s also a reader experience thing. You’re giving your audience a one-click way to say “yes, I want more of this” — and that’s a pretty easy win to put in front of them.
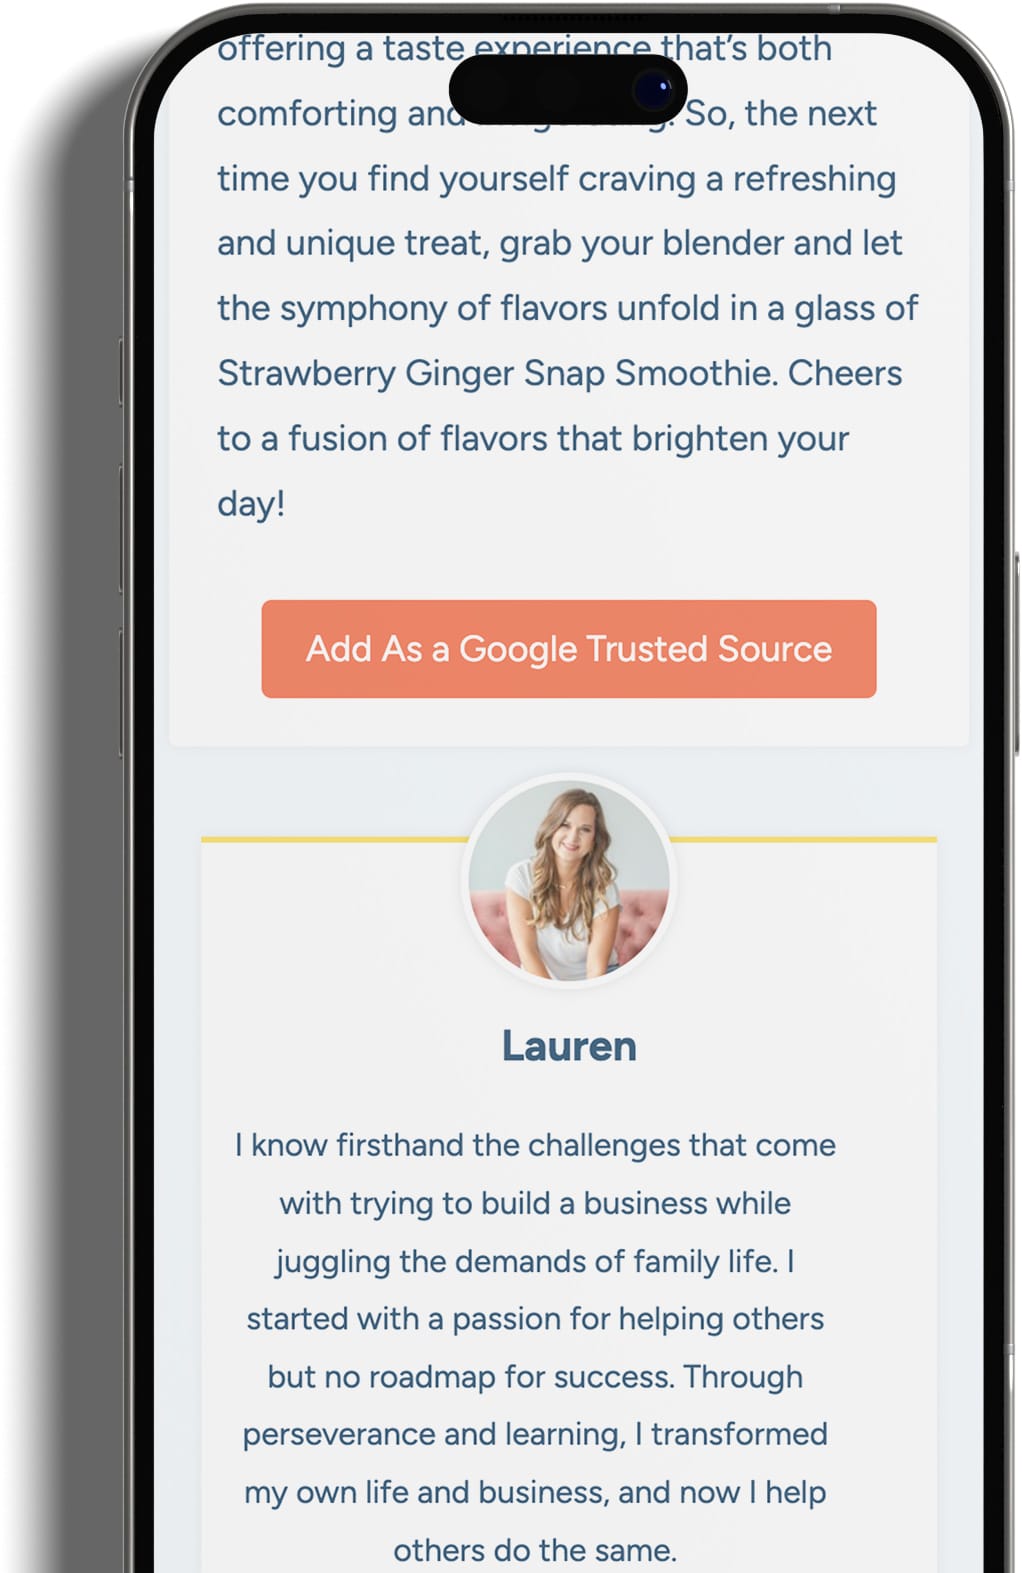
The button itself is not complicated. It’s really just a link with a specific URL structure that sends readers to a Google preferences page with your domain pre-filled. That’s it. No plugin required, no developer needed.
The Link Structure You Need
Here’s the magic formula. The link you’ll use for your Google trusted source button looks like this:
https://www.google.com/preferences/source?q=https://yourdomainhere.comYou just swap out yourdomainhere.com with your actual domain. So if your site is mybakingblog.com, your link would be:
https://www.google.com/preferences/source?q=https://mybakingblog.com
That’s the whole thing. When someone clicks that link, Google opens a preferences page and your site is already queued up as the source they’re adding. Super simple on the reader’s end, and even simpler to set up on yours.
How to Add the Button to a Single Post (No Kadence Pro Needed)
If you want to start small and just add the button to one blog post to test it out, you can do that right inside the WordPress block editor without any special tools.
Here’s how:
1. Open the post you want to add it to.
2. Click the plus icon to add a new block and search for “buttons.” Choose the Buttons (Adva) block. This is the Kadence Blocks version, and it gives you more styling control.
3. Type your button text. Something like “Add as a Google Trusted Source” works great. It’s clear, action-oriented, and tells readers exactly what will happen when they click.
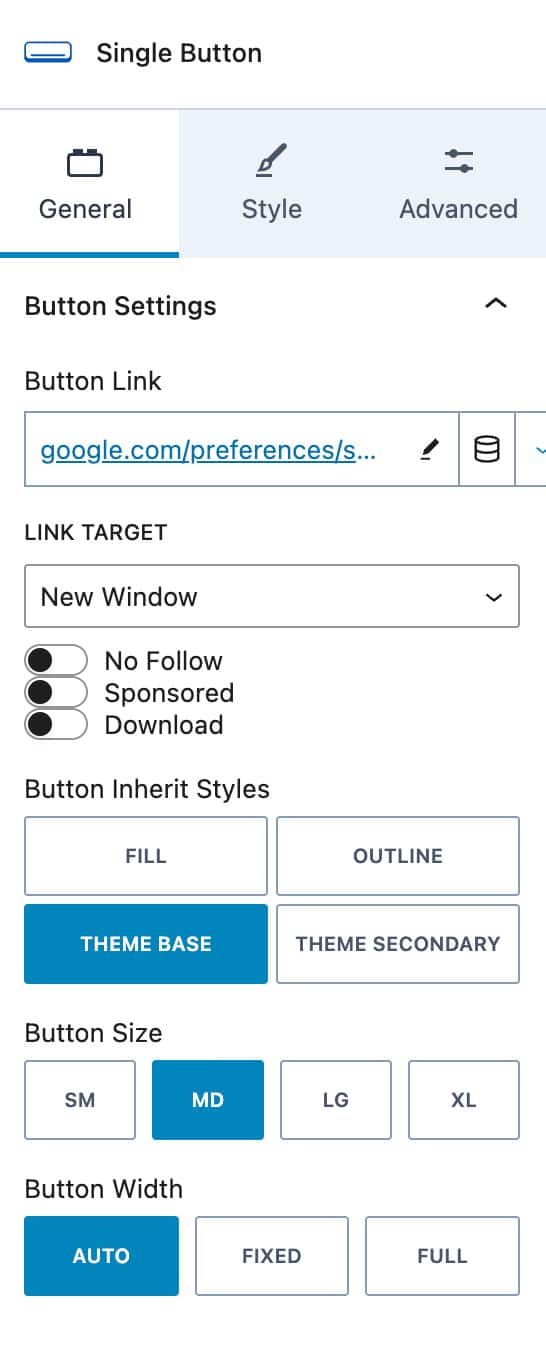
4. On the right side in the block settings, look for Button Settings and then Button Link. Paste in your full Google trusted source link with your domain swapped in.
5. Click the little arrow to the right of the link field to confirm and save it.
6. Also in the button settings, set Button Inherit Styles to Theme Base. This pulls in your theme’s button styling automatically so the button matches the rest of your site without you having to fiddle with colors or fonts.
7. Finally, click the small dropdown arrow next to Button Link and make sure Link Target is set to New Window. This keeps readers on your site while Google opens in a separate tab, which is exactly what you want.
That’s it. Publish or update the post and you’re done.
How to Add the Google Trusted Source Button to Every Post (Kadence Pro Required)
Adding the button to one post is fine, but honestly? The real value is having it show up on every single blog post automatically. That way, readers who land on any of your posts always have the option to add you as a trusted source — not just the one you happened to add it to manually.
To do this globally, you’ll need Kadence Pro. Specifically, you’ll be using the Hooked Elements feature, which lets you insert custom content before or after your post content sitewide.
Step 1: Make sure Hooked Elements is enabled
Go to Appearance > Kadence in your WordPress dashboard. Look for Hooked Elements and make sure it’s turned on. Once it’s enabled, refresh your screen.
Step 2: Go to Appearance > Elements
After refreshing, you should now see Elements listed under the Appearance menu. Click it, then click Add New Element at the top.
Step 3: Choose Content Section
An Element Setup popup will appear. Select Content Section as the element type, then give it a title. Something like “Google Trusted Source Button” keeps it easy to find later.
Step 4: Add the Buttons Advanced block
Inside the element editor, click the plus icon to add a block. Type a backslash (\) followed by the word “button” to search for it, and choose Buttons (Advanced). Add your button text and set up the link and styling exactly the same way you did for the single-post version above:
- Button text: “Add as a Google Trusted Source”
- Button Link: your Google trusted source URL with your domain
- Click the arrow to save the link
- Link Target: New Window
- Button Inherit Styles: Theme Base
Step 5: Set the placement
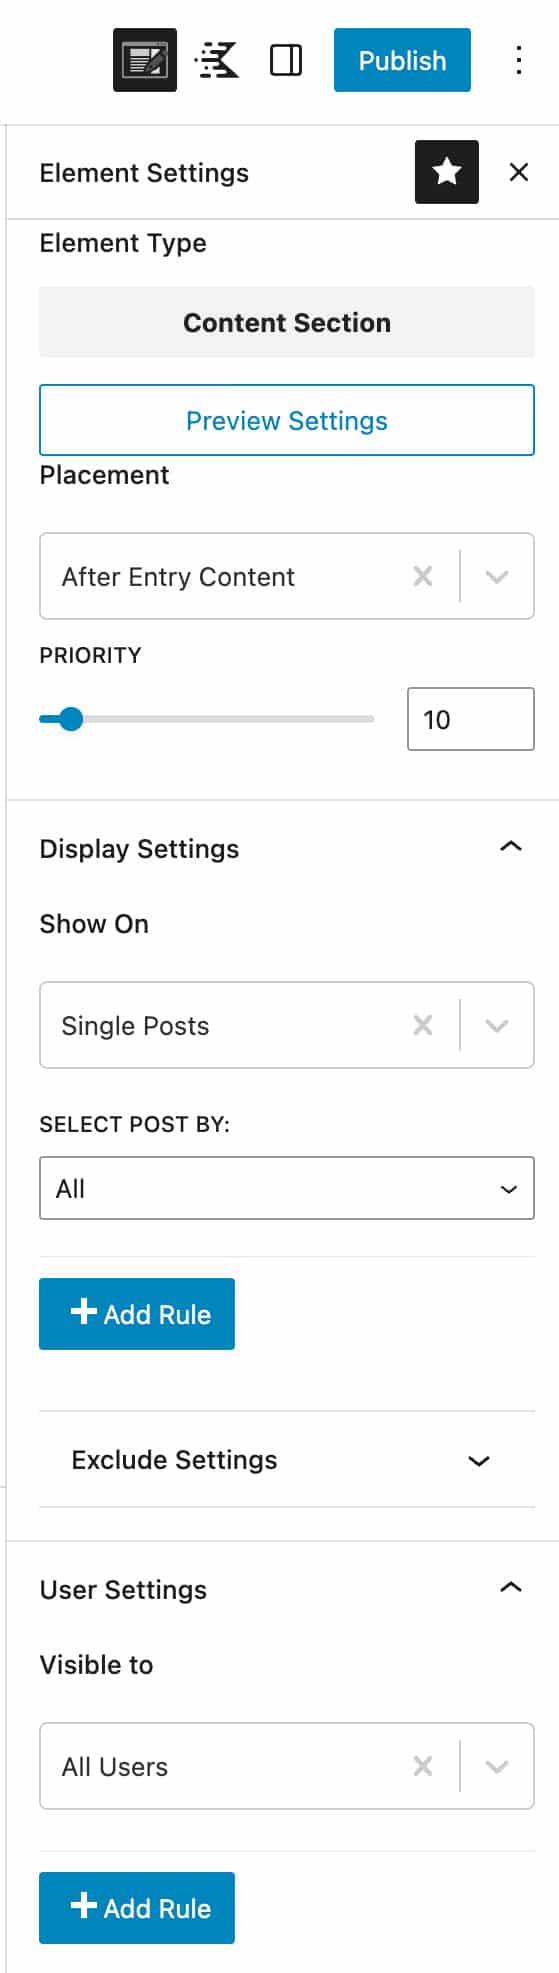
Here’s the step that trips people up: you’re NOT clicking on the “Element” tab in the left sidebar. Instead, look for the small icon in the top header bar, directly to the left of the Kadence logo. It’s labeled Element Settings. Click that.
Under Placement, choose either “Before Entry Content” or “After Entry Content” depending on where you want the button to appear — at the top of each post or the bottom.
Step 6: Set your display and user settings
Under Display Settings, choose Single Post. This tells Kadence to only show the element on individual blog posts, not on pages or archives.
Under User Settings, choose All Users. This is important — if you skip this or leave it on a restricted setting, the button won’t show up for most of your readers.
Step 7: Publish the element
Hit Publish, and just like that, the Google trusted source button will now appear at the top or bottom of every single blog post on your site. No going back and manually updating each post. It just works.
A Few Tips Before You Go Live
Once you’ve got the button in place, here are a few things worth keeping in mind.
The button text matters. “Add as a Google Trusted Source” is clear and specific. Avoid vague phrases like “Click here” or “Learn more” as readers should know exactly what they’re doing before they click.
Theme Base styling is your friend. Using Theme Base for the button inherit styles means the button will automatically match your site’s existing button color, font, and border radius. So even if you update your theme colors later, the button updates too. You don’t have to remember to go fix it.
New window is non-negotiable. Always set the link to open in a new window. Google’s preferences page will load externally, and you don’t want readers navigating away from your site to complete the action. Opening in a new tab keeps the experience smooth for them.
Is a Google Trusted Source Button Worth Adding?
Short answer: yes, and it takes about five minutes. Even if only a small percentage of your readers actually click it, those clicks add up. You’re essentially giving your audience a way to vote for your content directly inside Google’s system — and that’s not something you want to leave off the table.
For more tools and affiliate resources that Lauren recommends for building and growing your WordPress site, check out our Resources page.
For more info on how Google handles trusted sources for content publishers, you can also check out the Google Publisher Center help documentation.
The Bottom Line
Adding a Google trusted source button really is as simple as it sounds. You create a button block, paste in your link with your domain, set the styling to match your theme, and you’re done. If you want it on every post automatically, Kadence Pro’s Hooked Elements feature makes that a five-minute setup with no custom code, no developer, and no stress.