How to add Custom Icons to Kadence
Dress up your website by infusing it with Custom Icons in Kadence that reflect your brand’s personality! Personalized icons are one secret weapon to elevate your website’s appearance, giving it a touch of sophistication and professionalism.
There are endless possibilities of incorporating custom icons into your website design – from sprucing up your navigation menu to adding flair to your buttons, services, or categories of content.
Did you know that with Kadence Blocks Pro, you possess the power to effortlessly upload your very own custom icons to Kadence? In this comprehensive guide, I’ll guide you through the entire process, offering valuable tips and tricks along the way to make your website truly one-of-a-kind!
Create your Custom Icons
Alright, let’s get this party started by making your own icons! You can use tools like Canva or Adobe Illustrator for this. In order to make them work smoothly though, these icons will need to be saved as SVG files.
SVGs are awesome because they’re like magic – they can be big or small without getting all blurry. Oh, and a quick heads up: If you’re using Canva, you’ll need a paid account to export SVG files. If you don’t have a paid account with Canva, I highly recommend getting one, even if it’s for a short period of time while you’re establishing your brand’s identity.
What size do I create them?
When creating your icons, it’s a good idea to go with a square format. Make sure your design fills up as much of that square as possible. Avoid having your icon floating in the middle of a square with a bunch of white space around it, as this can make it look small when placed on your site.
If your graphic isn’t naturally square, just make sure it stretches out either horizontally or vertically to use up as much space as you can.
Since we’re saving these as SVG files, the canvas size isn’t critical, but I tend to use around 1000×1000 as it helps me work on my icons with clarity.
What should I keep in mind when designing my icons?
When you’re designing your icons, remember a couple of key things:
The Size of your Custom Icons
Firstly, some of your icons will need to shine even when they’re tiny, like those social media-sized icons. So, your design should hold up well whether it’s big or small, unless you’re planning to use a specific icon exclusively in larger spaces.
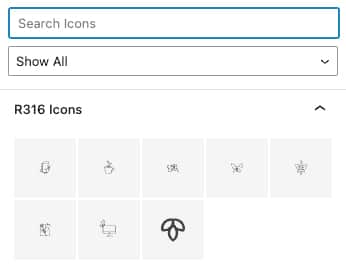
Here’s a quick example for you: Check out the icons below. Those are all custom icons we’ve loaded up. But let’s be real, not all of them play nice when they’re super small. We reserve them for the big spaces. However, our little flower bud icon? It’s a champ in smaller spaces, so we sprinkle it around to add some flair to lists and navigation items.
Colors in your Custom Icons
Next up, let’s chat about the kind of icons we’re focusing on. These icons work best when they’re a single color. This allows you to switch up their color depending on where you place them in your design. Sometimes you’ll want the icon to be white on a darker background, and other times, you’ll prefer it darker against a lighter backdrop. When you tweak the color of these icons, it transforms the entire icon, which provides you lots of flexibility.
Now, if you happen to have icons with multiple colors, it’s better to use them as images directly inserted into your content rather than as icons.
Worked with a designer?
If you’ve collaborated with a designer for your brand, chances are they provided you with SVG files for your icons. Just double-check that they align with the tips mentioned earlier, and you’re good to go to the next stage.
If you find the need to resize them to occupy more of that white space, it’s a breeze. Simply upload all your SVG files to your Brand in Canva, toss them onto a square canvas, stretch them to fill the space, and then export your SVG files.
What kinds of designs are icon-worthy?
Well, let’s ignite that spark of creativity!
You can bring in your own arrows, add a touch of sparkle, sprinkle in some hearts, or infuse your icons with leaves, and the list goes on! Feel free to experiment, and if something doesn’t quite shine in a small space, don’t hesitate to switch things up. These steps are a breeze to follow, and once you’ve done it once, you’ll be a pro at creating and uploading your very own custom icons!
Now that you’ve got your SVG files all set for your new icons, it’s time to dive into the next step!
Generate Icon File for Custom Icons
We’re about to dive into using a cool website called IcoMoon that will do the magic of generating a file for our custom icons! The best part? It’s absolutely free, and you can even use it without having to create an account. But for convenience’s sake, I’d recommend setting up a free account, just in case you want to come back later to add more icons or make tweaks.
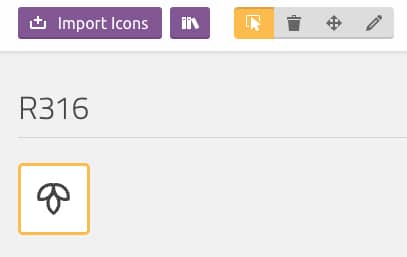
Once you’ve arrived at IcoMoon, you’ll click the purple “Import Icons” button in the top left corner. Click it and select ALL the SVG files you want to upload.
This will toss all your icons into a brand-new set called “Untitled Set.” If you’d like to give this set a custom name, simply click the three-line icon to the right of it, then choose “Properties.” A popup window will appear, allowing you to select “Edit Metadata” and enter your own set name.
Now, ensure that the icon with the mouse pointer is selected at the top (it should be the default), and start clicking on all the icons you want to export into a single file.

Towards the bottom of your screen, right in the middle, you’ll spot the number of icons you’ve selected. Make sure it’s correct with your choices and that no accidental extras have sneaked in.
Next up, click the “Generate Font” button; it’s hanging out in the bottom right corner of your screen. This will bring you to a new page where you’ll see the “Download” button, also located in the bottom right corner.
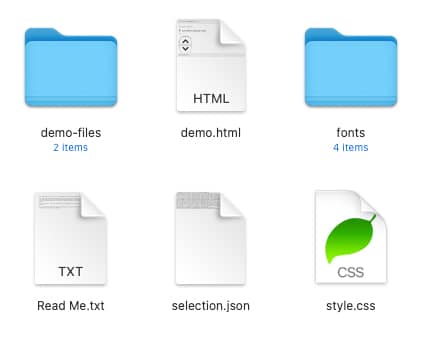
Clicking this will download a file to your computer, a zip file with the name “icomoon.zip.” Double-click on that zip file so it will unzip and give you a folder. We are only going to need one file inside that folder, not the entire zip file.
Now, we’re all set to go to the next step of getting these icons onto our website!
Upload your Custom Icons to Kadence
As mentioned earlier in this post, to upload your personalized icons, you’ll need to have both Kadence Blocks and Kadence Blocks Pro installed, activated, and your license key entered.
Once you’ve got that covered, head over to Kadence Blocks > Custom Icons. When you’re there, click the “Add New Custom Icon” button located at the top of the screen.
Now, go ahead and give your new icons a name. This name won’t be visible to anyone else, so it’s purely for your reference to know what you’re uploading. Keep in mind that you’ll be uploading the entire file containing ALL the icons you downloaded; it won’t be just one icon unless that’s all you downloaded.
Beneath your title, click the “upload an icon file” button. You’ll need to browse and select the “selection.json” file from inside the “icomoon” folder you downloaded and unzipped in the previous step. Then, hit the upload button.

Once uploaded, you should see all your available icons right there on the screen!
Now, you have the option to decide whether you want these icons to be the sole ones available to you. Under the “show only these icons” setting, you can choose “false” if you’d like to have both your custom icons and the default ones at your disposal throughout your website.
Lastly, hit that “Publish” button for your new icons. Once they’re published, you’ll be able to access them while editing your pages and posts!
Put your Custom Icons in Kadence to use
After you’ve published your icons, you’ll spot them in any Kadence Block that welcomes icons. The icon block, icon list block, info box block, and the button block are some great options to start with!
When it’s time to switch up your icons, you’ll notice your Custom Icons right at the top of the selection list. You can also simply use the dropdown menu to specifically choose your custom icon set.

Incorporating custom icons in Kadence can truly transform the look and feel of your website. Now that you’re armed with this knowledge, go ahead and start adding that personal touch to your web presence. Get creative, experiment, and watch your site shine with a unique identity. Your visitors will thank you for it!


I just put a kadence theme on one my new site!
I had no trouble creating a custom icon set and publishing it. However, it does not show in the available icons even though they set is live. I don’t think I missed a step as I’ve gone through the tutorial 3 or 4 times.
Hmmm! I’m not sure what is happening on this one until I take a closer look. Can you submit a ticket for me?