Connecting Genesis eNews Extended and Mad Mimi
Growing your email list is one of the best ways to connect with your audience. Why? Because it doesn’t change and it’s super personal. Think about it when you see a post on a social media outlet it doesn’t necessarily feel like it’s be written just for you, does it? However, when you open an email with your name in it and the sender is writing directly to you, it sounds so much more personal. Email is also something that doesn’t really change. There aren’t any algorithm changes that will prevent your audience from seeing your content, which means instead of constantly trying to keep up with changes, you can focus on writing really great emails instead.
There are many different email marketing systems on the market. We recognize that not everyone uses the same ones. In order to ensure you have the freedom to choose your favorite provider and integrate it with your favorite Restored 316 Theme, we want to provide as many tutorials as possible for the most popular email marketing systems. We have explained how to connect MailChimp with Genesis Enews Extended in this post here and how to integrate ConvertKit and Genesis eNews Extended here. In this tutorial, we will show you how to connect another popular email marketing system, Mad Mimi, with a Genesis eNews Extended form within your Restored 316 theme.
Step 1: Create an account with Mad Mimi
Head over to Mad Mimi and create a free account available for up to 100 subscribers.
Step 2: Create a Form
Take note of the bottom right-hand section. This is where you can add fields like first name and last name. If you add fields here you will add fields in your Genesis form. Keep note of the fields you are adding.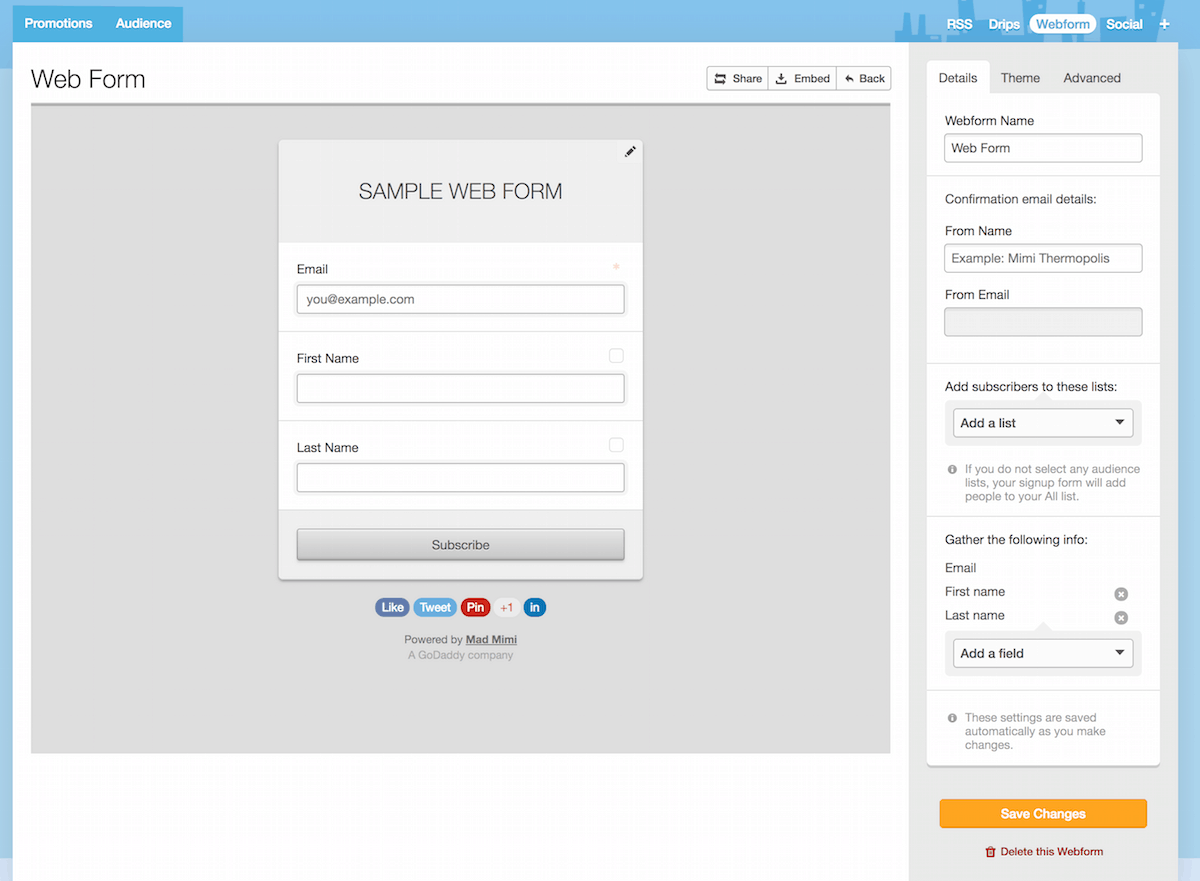
Step 3: Click the Embed Tab
Step 4: Click the Plain Embed Tab
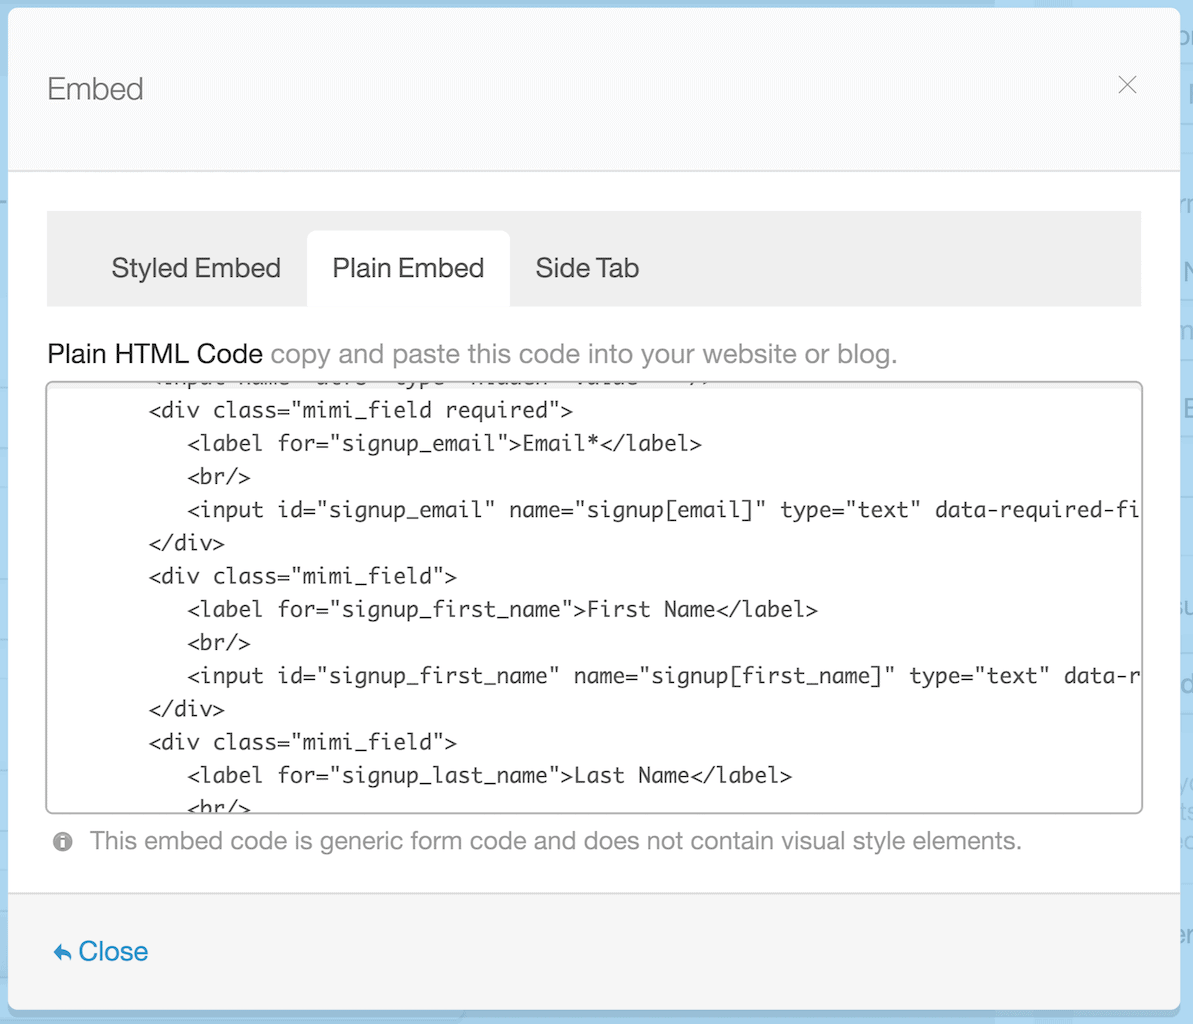
Step 5: Copy and Paste
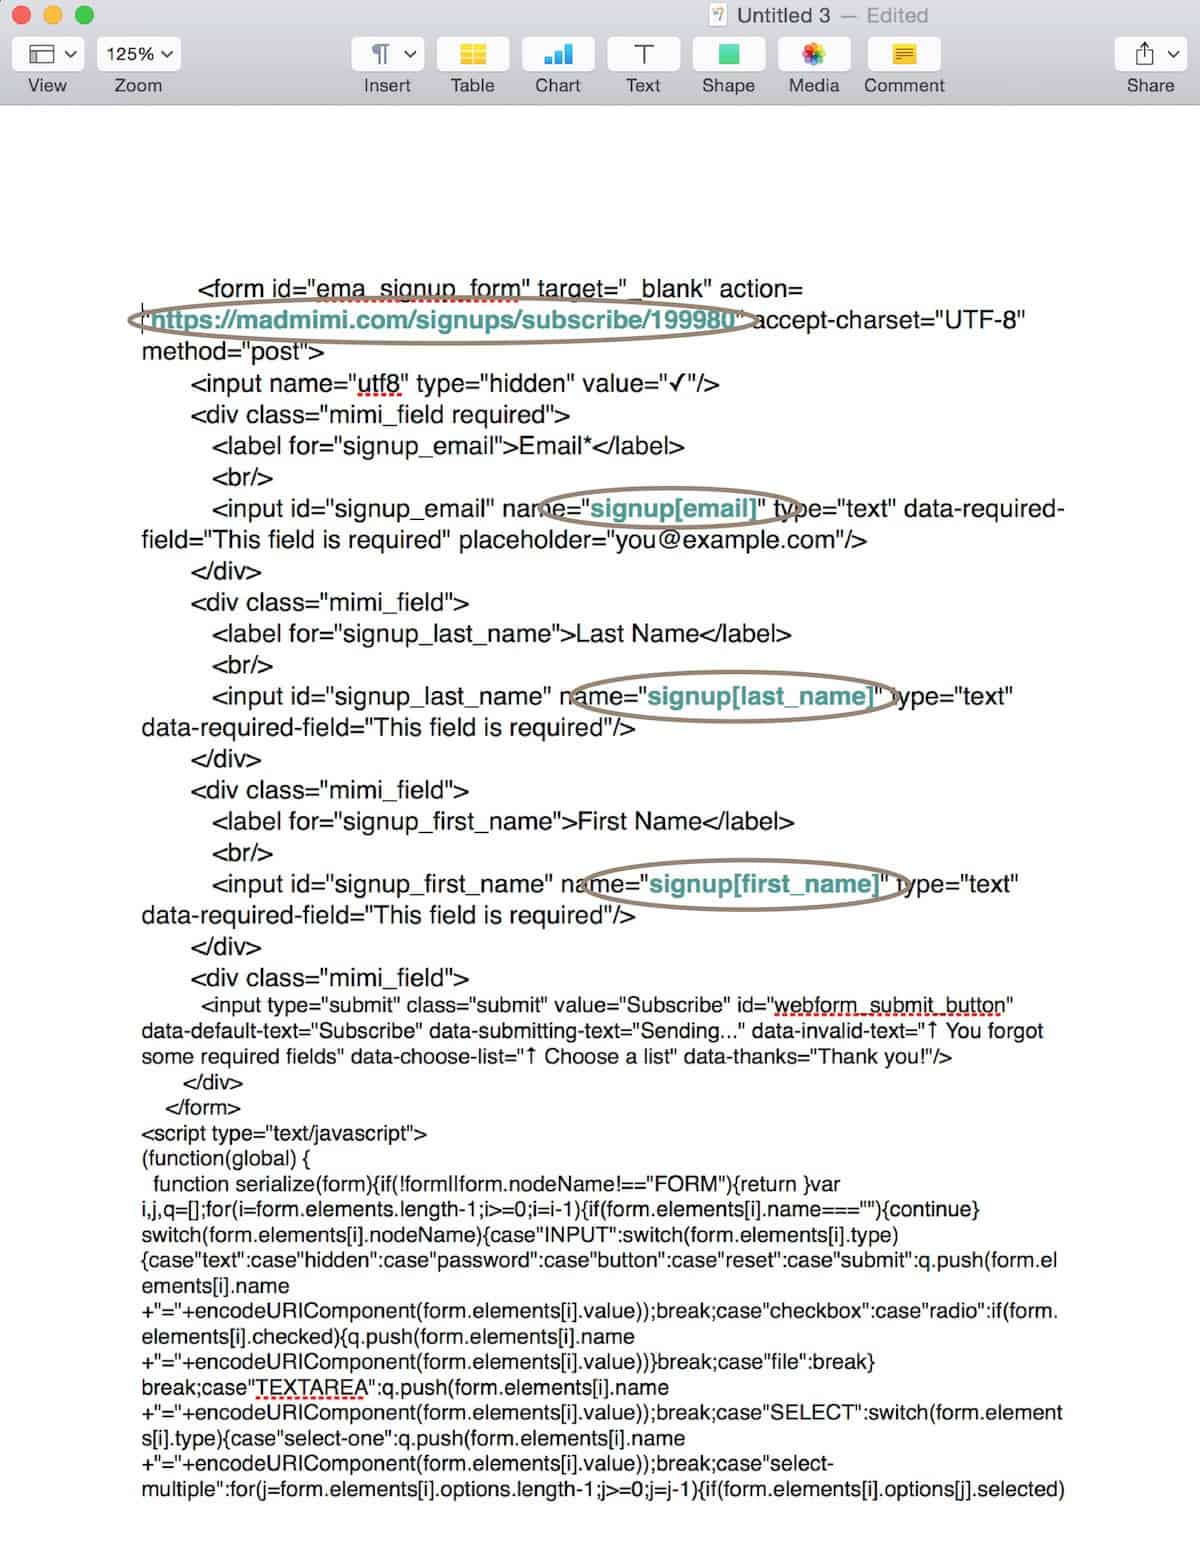
The easiest way to grab the codes you need is to copy the code from Mad Mimi into a document on your desktop. For some reason, you cannot copy small sections off of Mad Mimi.
Step 7: Install Genesis eNews Extended Plugin
Go to plugins and “add new”. You can search for Genesis eNews Extended or click here to download it directly. Next, install Genesis eNews Extended. Lastly, go to your widgets and drag Genesis eNews Extended into the appropriate widget area.
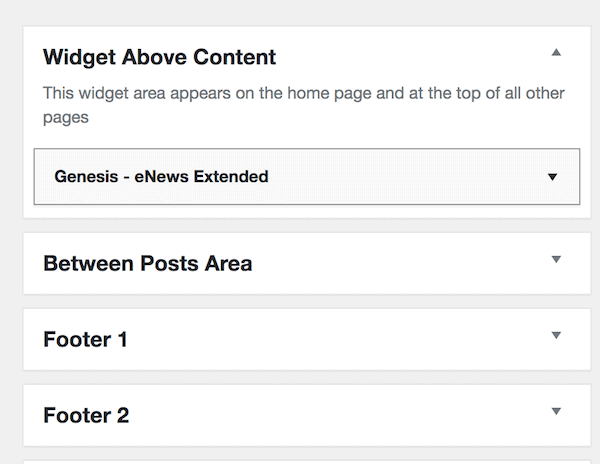
Step 8: Copy and Paste Text from Document to your Form
After you drag the Genesis eNews Extended to the appropriate widget area, click the small arrow in the right-hand corner of the widget to open the form up. Head back over to the document of code you pasted from Mad Mimi. Now, look for the URL that looks similar to what we’ve posted above. (NOTE: yours will look the same but with a different number at the end). Next, copy and paste any field codes that are needed. You can use the ones from above for first name and last name fields.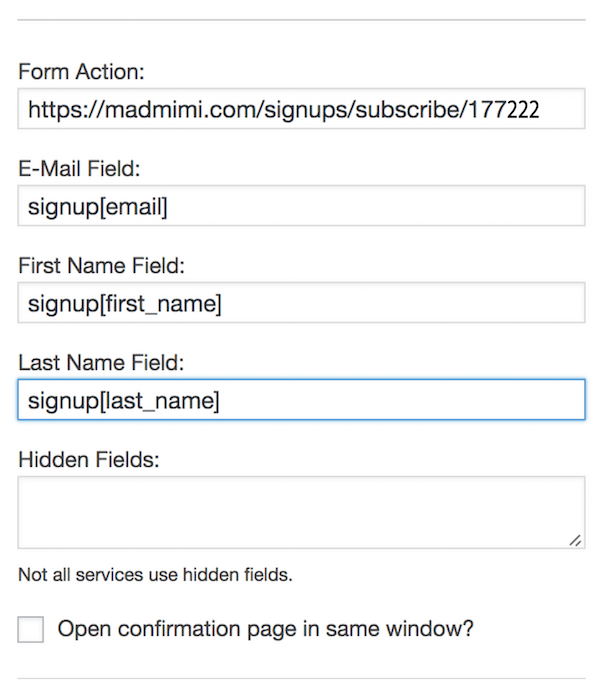
***Important: If you did not create fields for First Name and/or Last Name in Mad Mimi when you created your form, you will not use them on the Genesis eNews Extended form. You will only place additional field options if you created them in Mad Mimi.

Did you find this article helpful? Share it with others!
