How to set up a RSS campaign in Mailchimp
One of the most popular and sought after ways to draw readers to your blog or website, is through an RSS driven campaign. For some who may not be as familiar with social media jargon, you may be asking, “What is RSS?” or “What is an RSS driven campaign?” Simply put, this just means that you want to set up and allow the option for readers to not only view your posts and products on your site, but to choose if they would like to receive your posts directly to their email inbox whenever you publish a new one.
In this tutorial we are going to focus on setting this up with Mailchimp. Mailchimp is a great free option to start with if you have less than 2000 subscribers a month.
How do I get started?
First you’ll need to set up a MailChimp account if you don’t have one already. Once you do that you’ll be able to start setting up campaigns to get that content of yours out there.
Create your List
First you’re going to need to create a list. You’ll want to at least have someone to send your newsletter/RSS campaign to. For now, if you don’t know of anyone or haven’t had any subscribers, you can just add yourself or a family member. You’ll want to create a list. This is going to serve to house your subscribers and keep them all in one place. You’ll want to click on create a list and then choose whether you are going to create a single list or a group. For this purpose, we are going to create one single list of email subscribers.

Now you’ve got to give it a name. It doesn’t matter what the name is; probably something like [YOUR BLOG NAME] Subscribers will work just fine. Then you’ll want to choose the email that it comes from by default (your personal email or the email associated with your site, etc.) as well as who it shows up from (your name or your blog name) and just hit save! You can also create a little message here that will go out to subscribers once they sign up to remind them where or why they want to receive your emails.
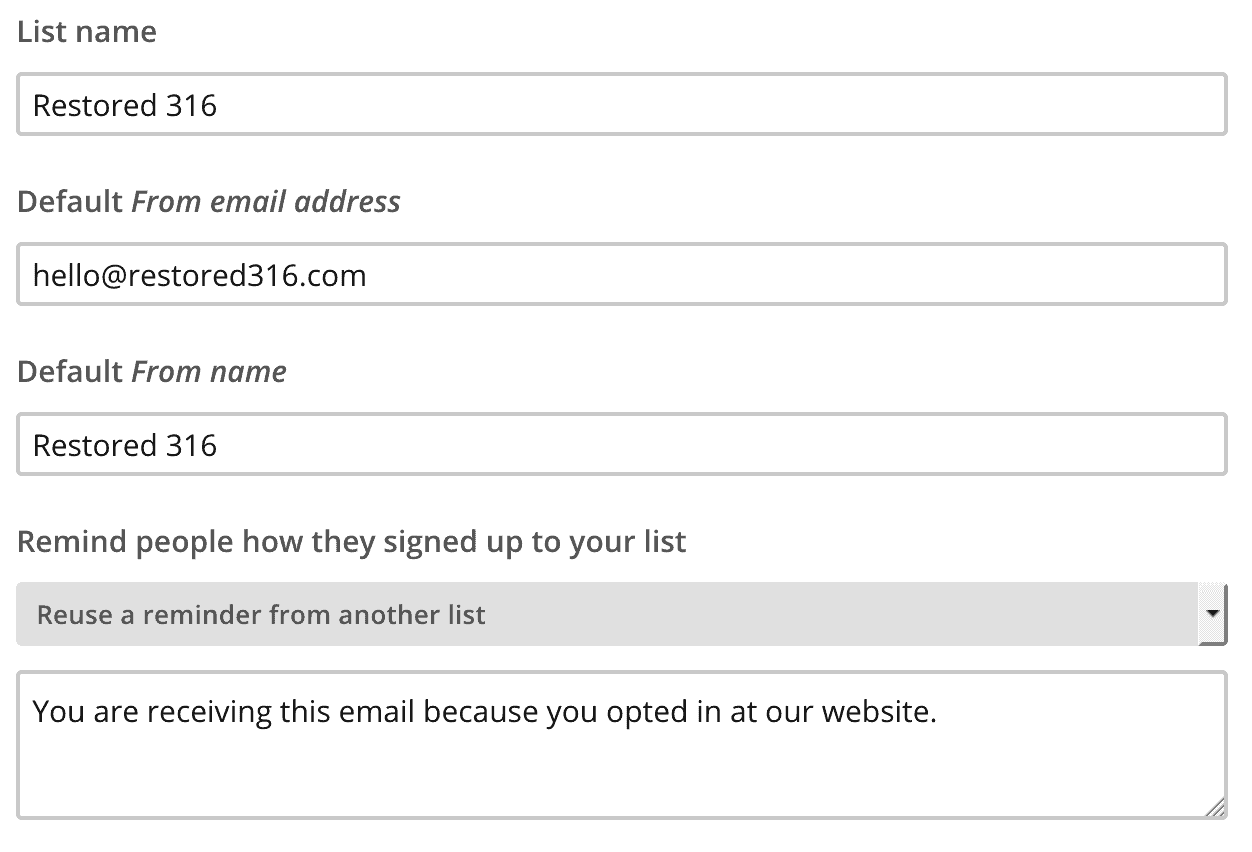
After you have hit save, it is going to ask you if you have any subscribers or want to add subscribers. If you are starting a fresh RSS Campaign, then you probably will not have any subscribers at this time. You can, however, manually add them or upload an exported file in this section.
Create RSS Campaign
Now that you have a list to send your content to, you’re ready to get started. You’ll need to login to your MailChimp dashboard and create a new campaign. You’ll see a link at the top for Campaign which you’ll click, and then select the Create Campaign button in the top right of the screen.
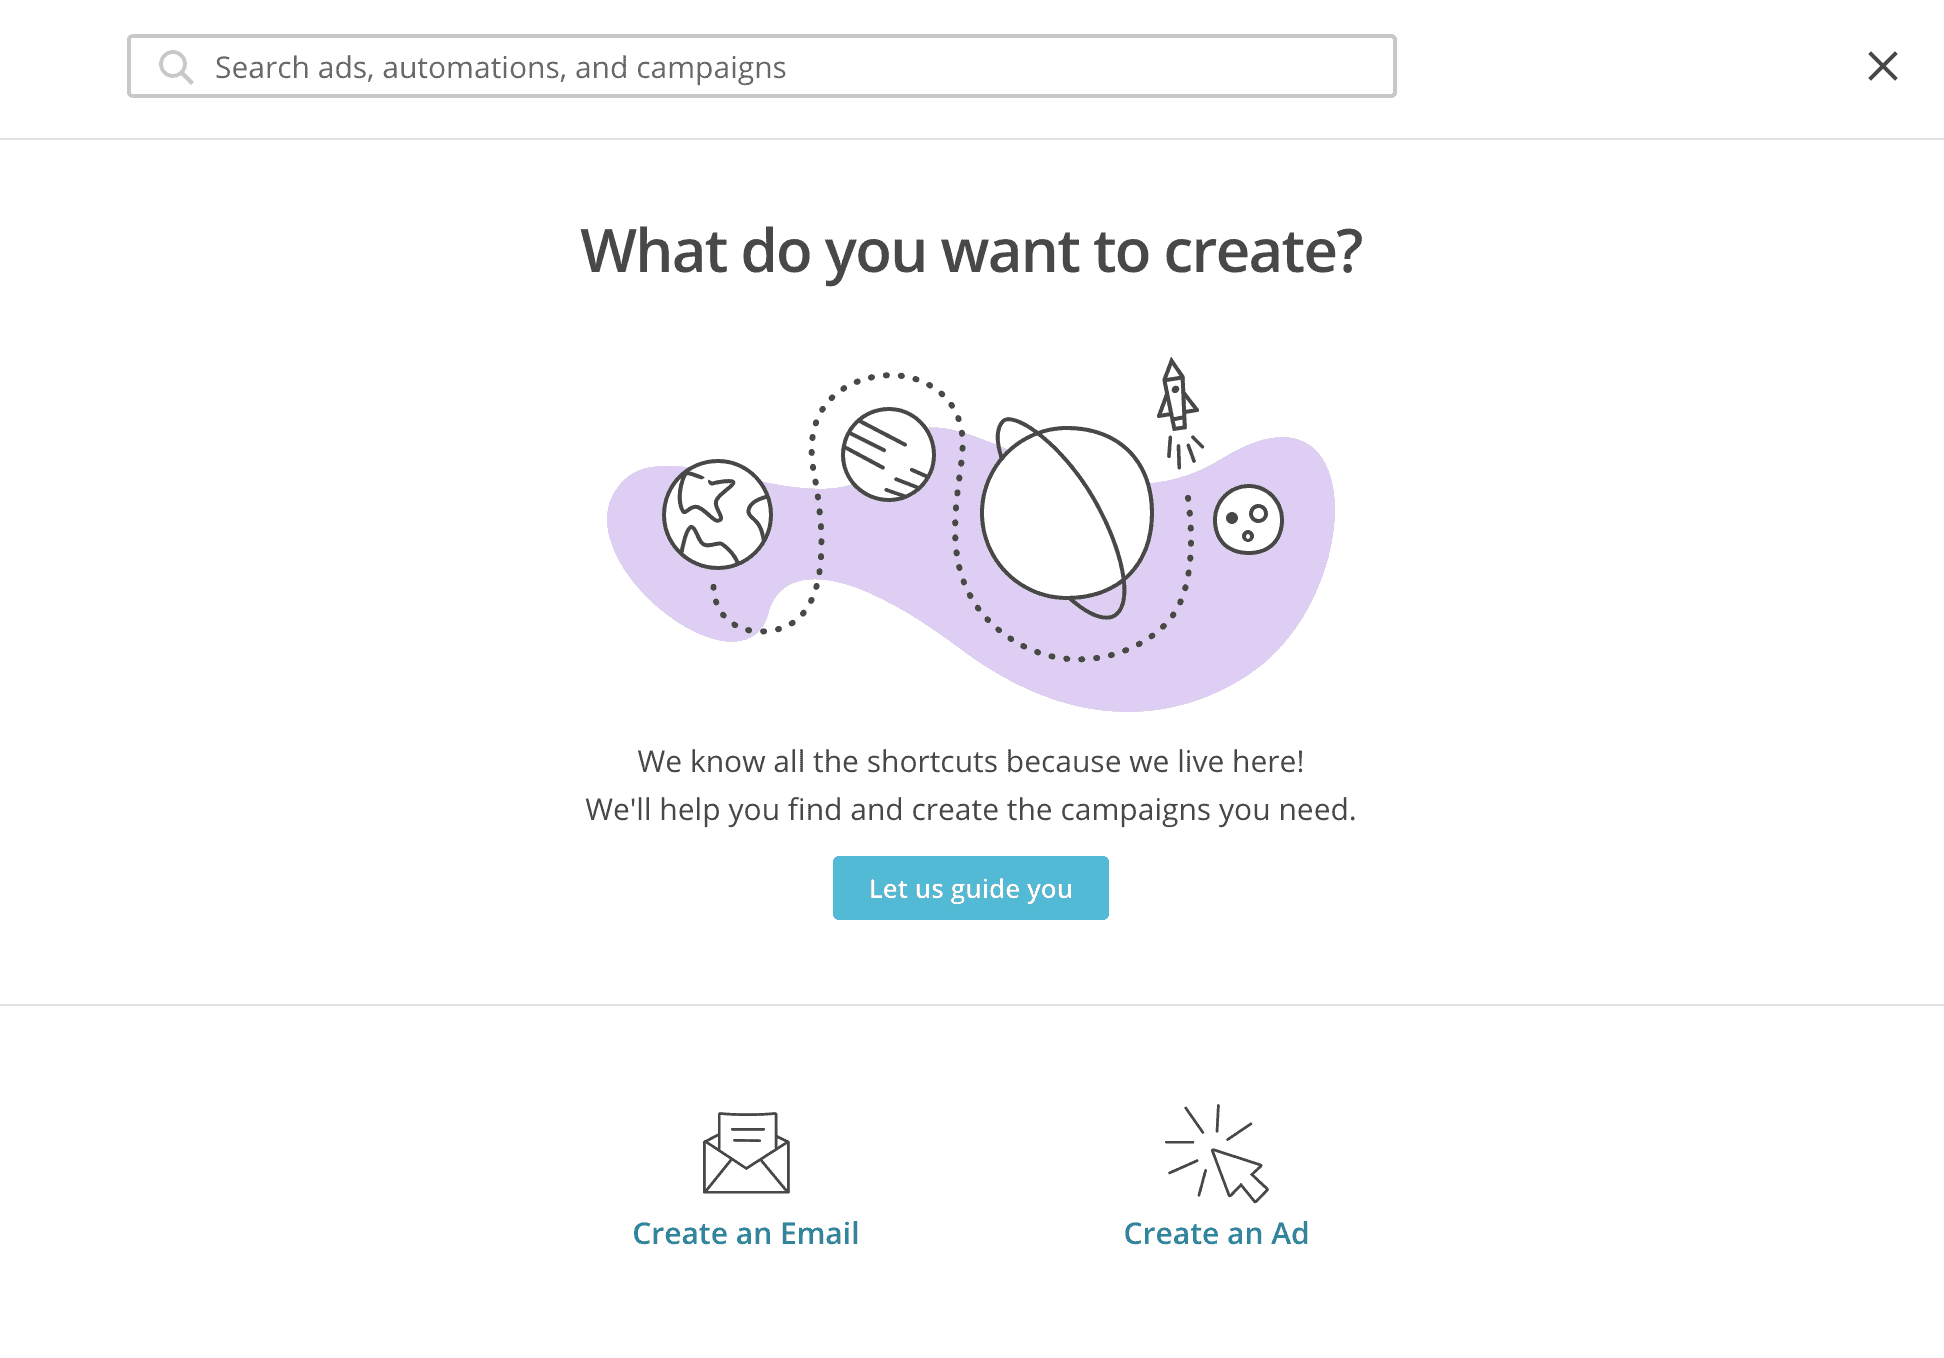
You’ll then see this pop up window and you’ll select the option there to Create an Email.
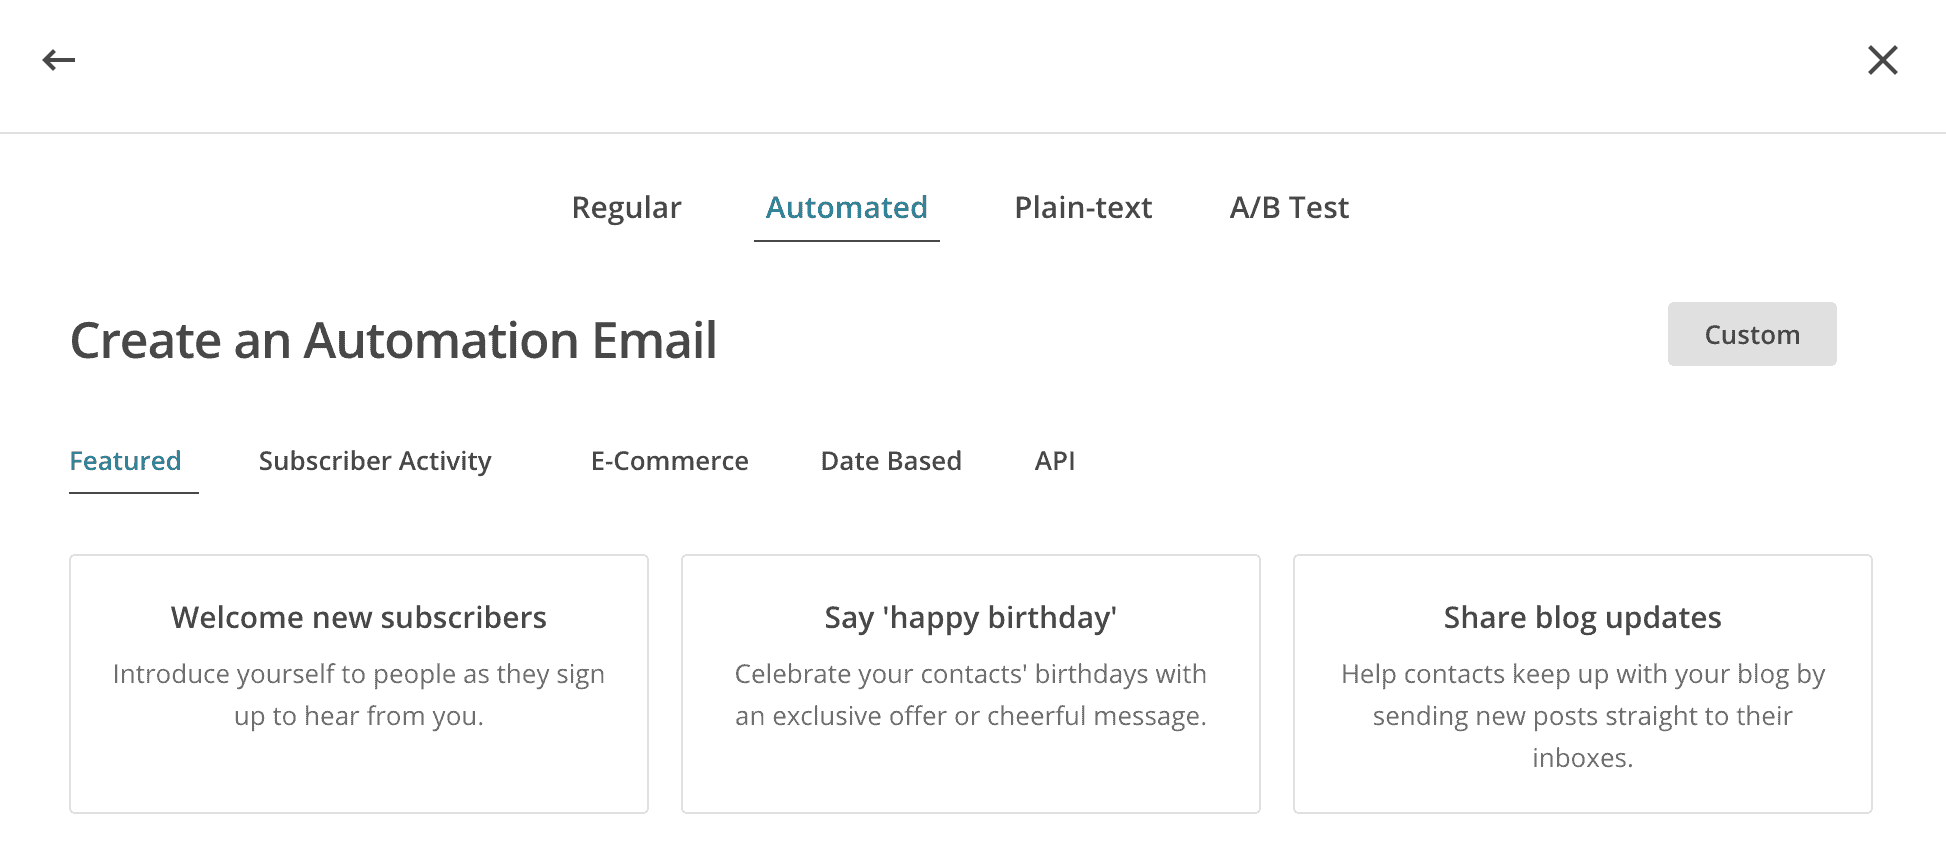
On the next screen you’ll make sure you select the Automated button at the top, and then select the Share blog updates option on the bottom right.
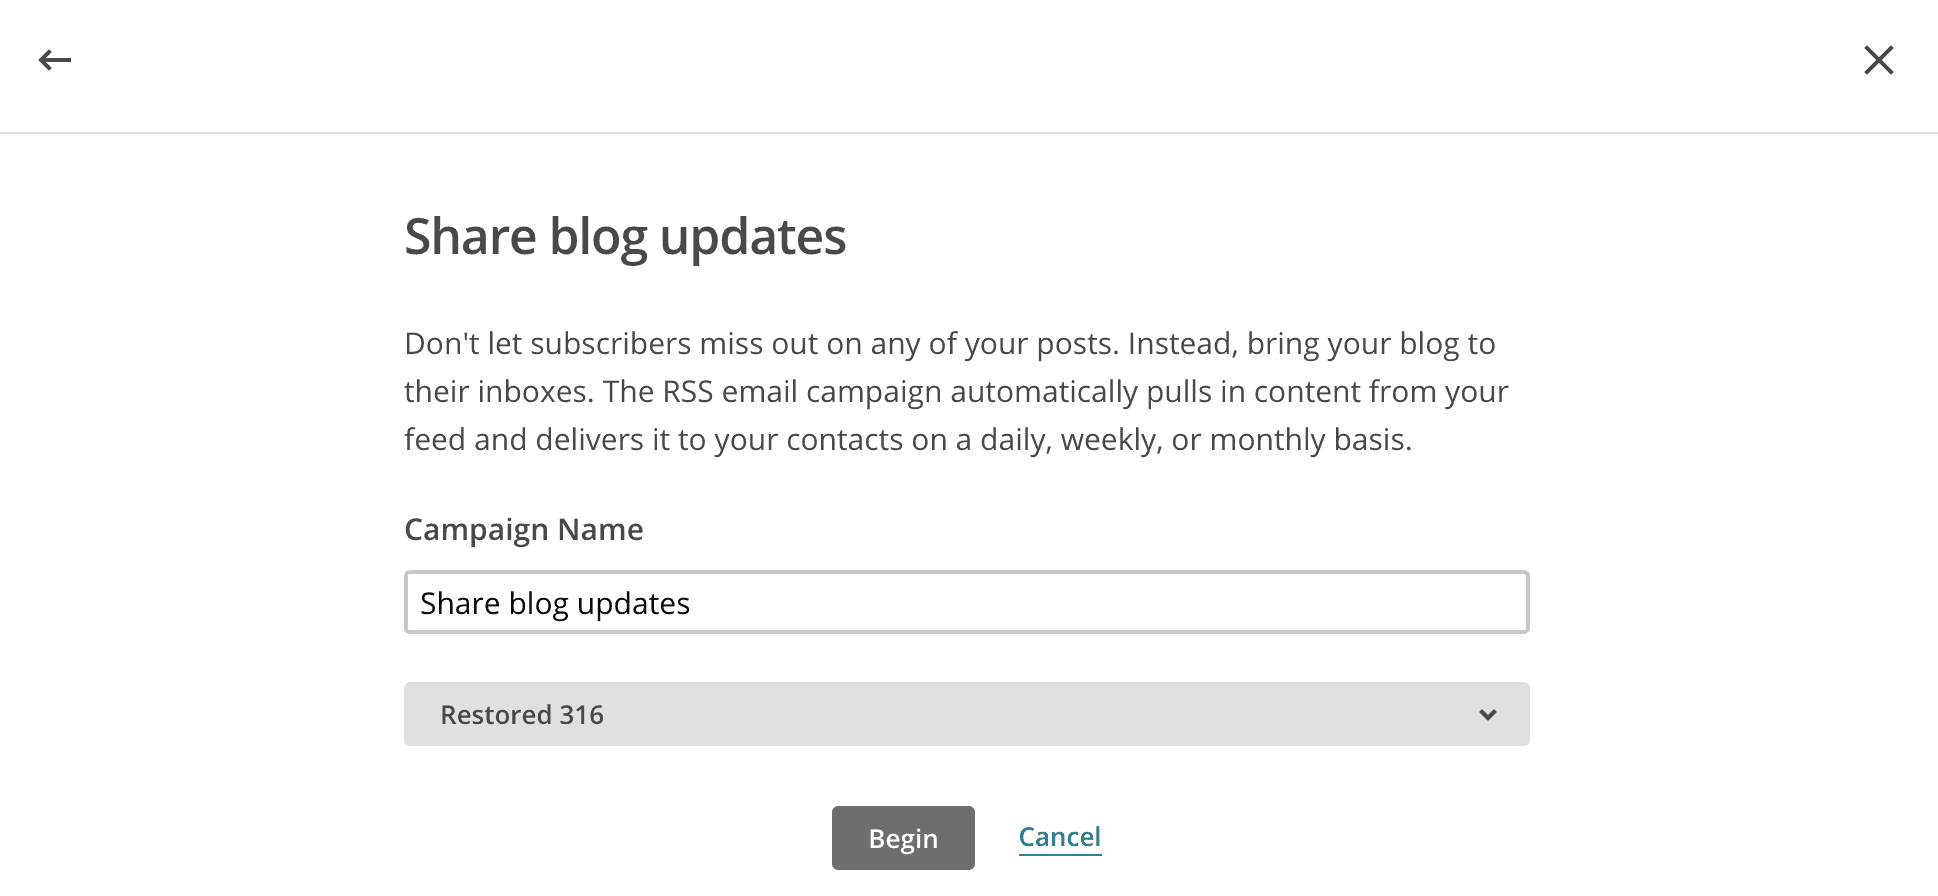
On this next screen you’ll give your Campaign a name with whatever you’d like. Then you’ll select the List you created in the first step from the drop down menu. You’ll then click the Begin button to get started establishing the actual newsletter.
Create your feed
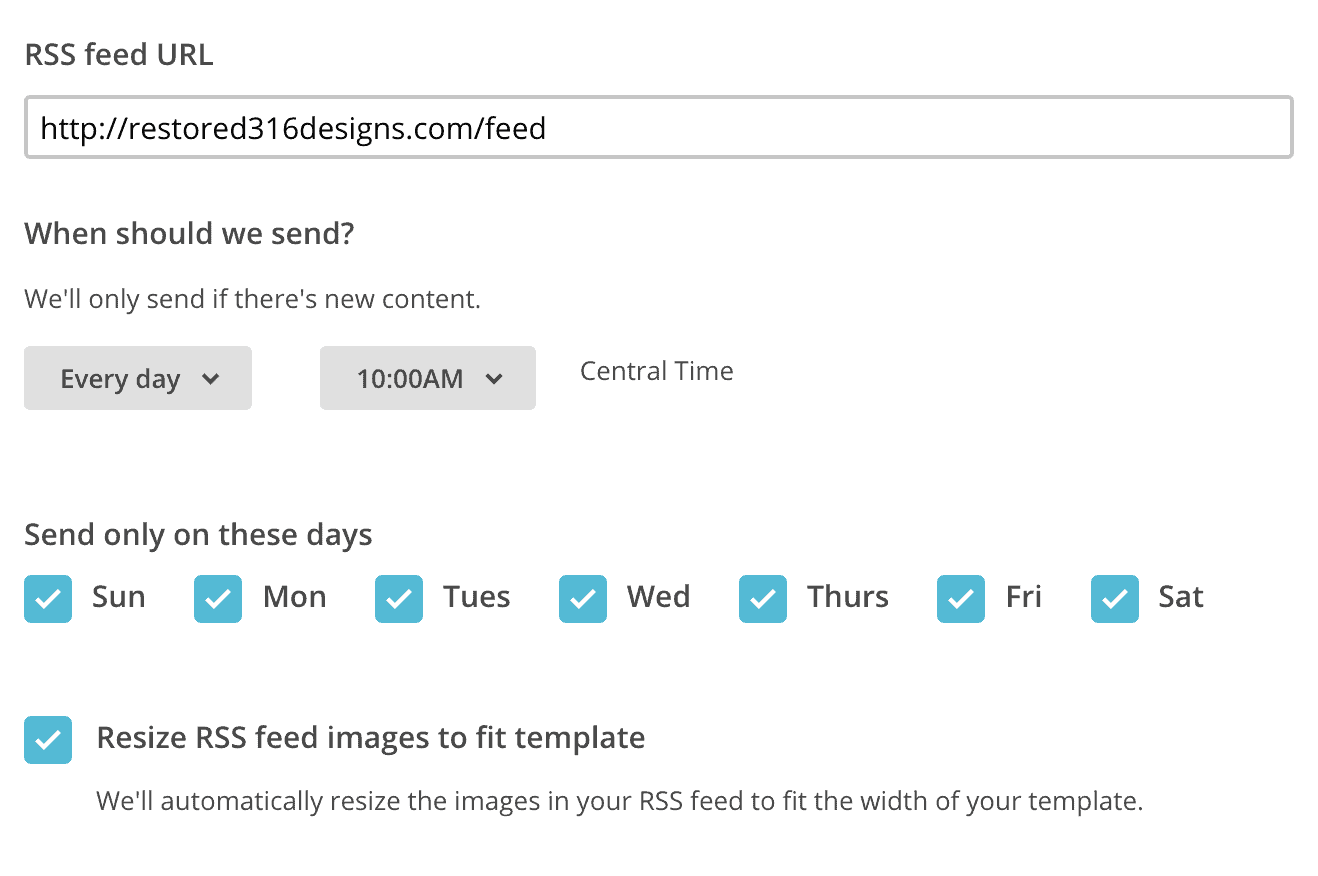
In this screen we will enter our RSS Feed URL. This will always be your domain with a /feed at the very end.
Note: If the site is in “maintenance / coming soon” mode, Mailchimp will not be able to find the feed. You will need to deactivate the coming soon plugin first. Once Mailchimp locates the feed, you can re-activate the plugin and continue setting up the campaign.
Then you’ll select at what time of day you’d like for this email to send.
Next, select which days of the week you’d like for it to send.
Keep in mind that the emails won’t go out the very moment that you hit “Publish” on a new post. If you write a post at 9:00 pm on a Monday and choose to send subscribers their email every day and you have it set for 10:00 am, then Monday’s post will be sent out on Tuesday morning at 10:00 am.
Once this page is completed, you’ll click the Next button on the bottom right of the screen.
Choose who will receive this RSS campaign
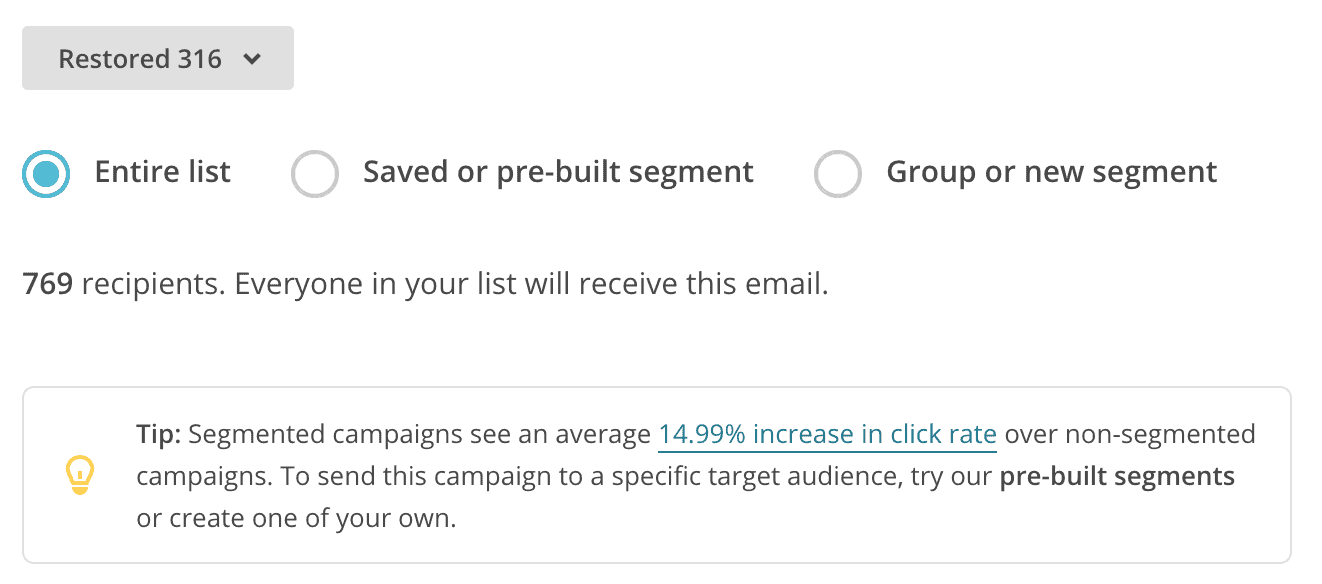
On this screen, you’ll select who you’d like to receive this campaign. For simplicity sake, we will choose to send this to the entire list. If you want to get a bit more fancy with this, you can choose a segment or group which you can read more about here.
Once this is selected you’ll proceed to the Next screen with the button on the bottom right.
Campaign Details
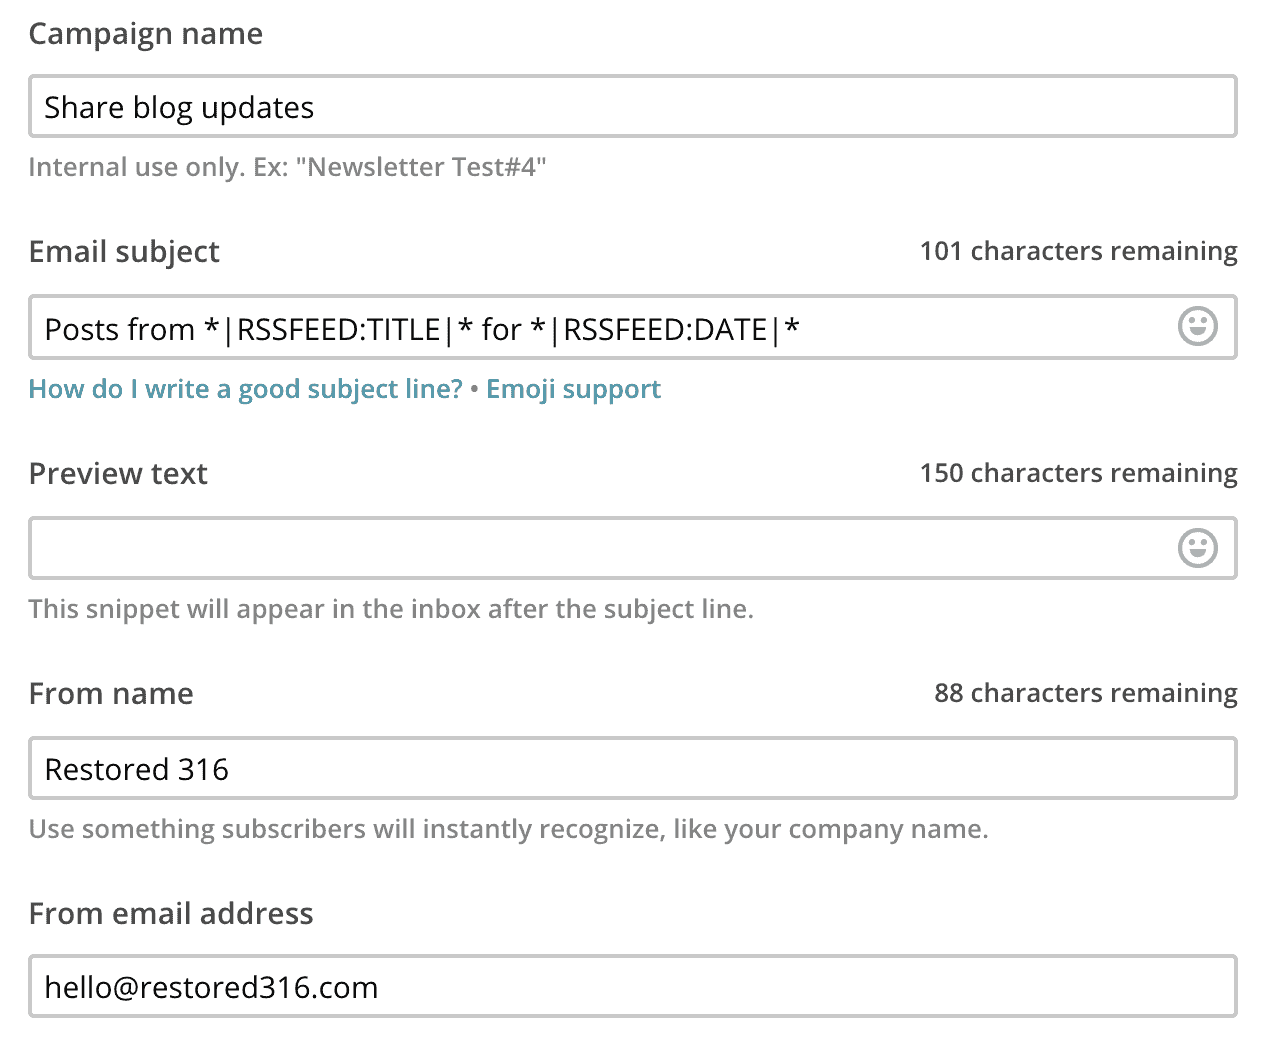
On the next screen, it will ask you for some more details here that you can edit to your needs. Most of this will automatically be filled out for you so you shouldn’t have to edit much here.
Once done here, you’ll click the Next button at the bottom right of the screen.
Choose your Template
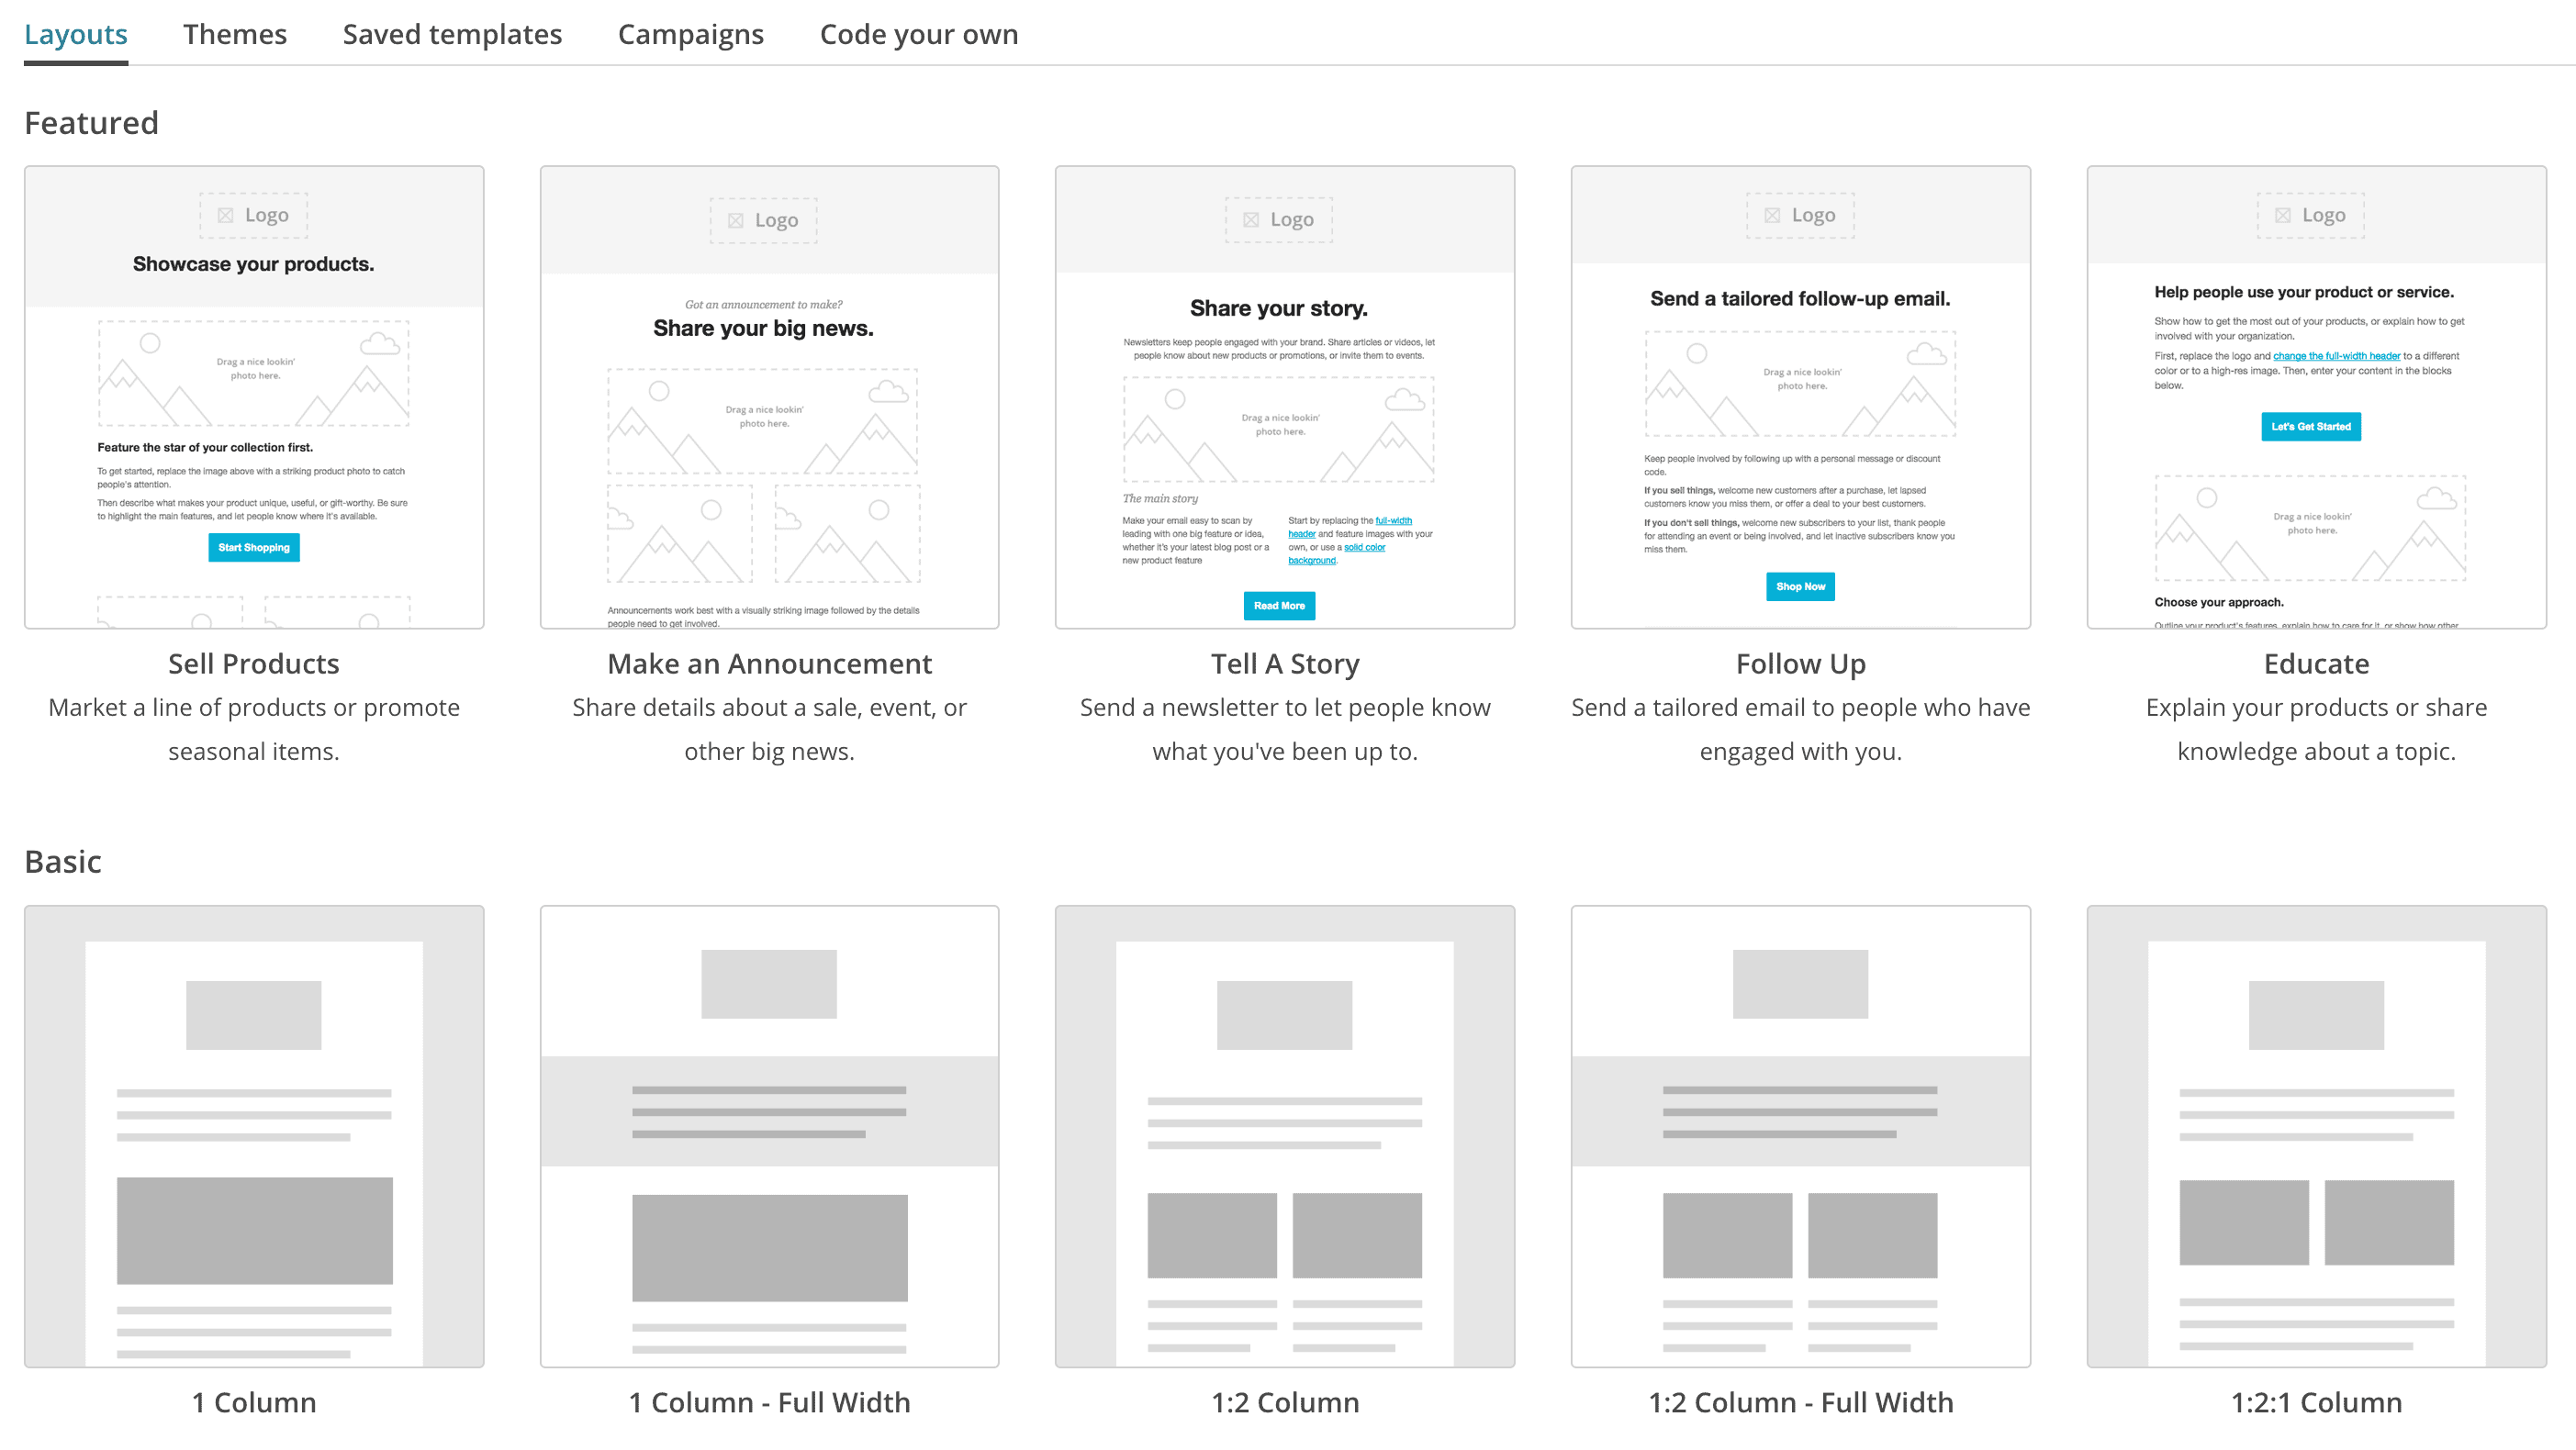
On this next screen you’ll see some featured Templates at the top and then some basic templates below that. I typically like to just use the Basic 1 Column format for a RSS driven campaign so that I can just upload my own header at the top and then the content of your blog post will appear in 1 column below that.
Feel free to select whichever works for you here. You are free to play with several formats as you can always come back to this and change it later.
Once you’ve decided what template you’d like to use, simply click on the box and it will send you to the next screen.
Create your design
Once on the next screen you’ll be given a lot of options to customize your design and we will need to do a couple things here to get it working with our RSS.
This screen is completely drag and drop, so you’ll be able to pick elements up from the right and drag them over to the left. So, we’re going to drag and drop the RSS Feed Title and the RSS Feed Items from the right of the screen into the template layout. It should look something like this:
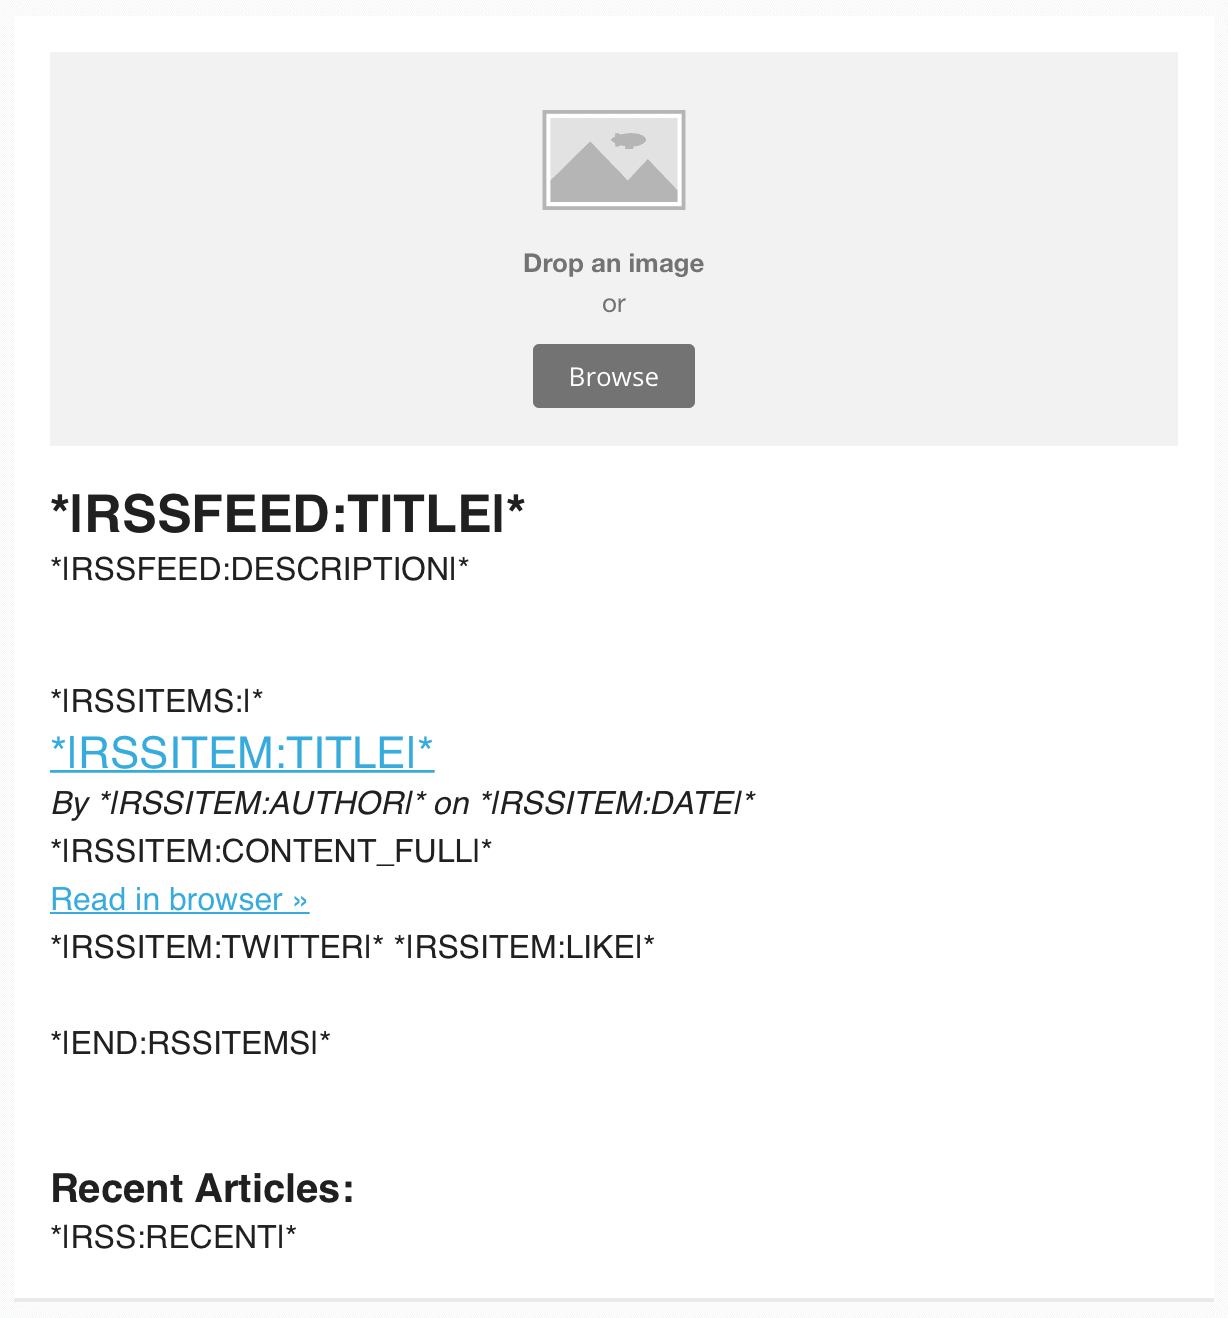
This process might be easier explained through showing you, so you are welcome to watch the video if you’re struggling with this part. This section of the video begins at 7:40.
Time to get those emails rolling to those new subscribers! If you’re curious about how to set up your MailChimp account directly in your blog so that readers can subscribe, we’ve written a tutorial for that too! If you need help customizing your MailChimp campaign, we have a great support team who would love to help you out!


Thank you so much for this tutorial! I tried to set up an RSS campaign on my own and failed miserably. This post made it so clear what I was doing wrong!
Yay! You’re so welcome! So happy it helped!
Can I just say that I love y’all! I needed to tweak the way my blog posts go out to readers and the thought of figuring it out on my own was DAUNTING!!! So, I did what I’ve done since the day I foudn Restored316. I came to your blog and did a search. This tutorial is PERFECT! And I am so excited about my new campaign set to start in a few days. You make this stuff easy for a tech challenged girl like me! Thank you for EVERYTHING!
Awww.. thank you so much Courtney! We are so happy you found this helpful!
Thanks for this great tutorial! I am in the process of setting up my MailChimp RSS subscriber emails, and I would like to include a featured image from each blog post to be pulled into each email. I see the image code I need to insert into my campaign template, but it appears I need to do something in WordPress as well (like inserting tags somewhere) to make sure MailChimp can view and pull the image. I\’m stuck on this step! Would you be able to advise what would be the best way to do this with my theme (Savory)?
Mailchimp should pull the featured image from your WordPress post. You would just want to make sure that you are setting a featured image through WordPress each time. If that isn’t working, I might would contact MailChimp directly. 🙂
Lori, did you figure this out? I am having the same issue with MailChimp. The RSS feed is not pulling my featured image for my RSS campaign.
Hi Jen,
Try this plugin and then make sure you add *|RSSITEM:IMAGE|* to your newsletter as well so it knows to pull your images in.
Regarding the RSS Feed and Send Timing, if I choose to send an email let’s say on Sundays at 3:00pm, will it only show blogposted that were posted Sunday, or will it show all posts since the last Sunday?
Hi Cody,
It will show any posts that published since the last newsletter went out.