How to Create a Free Resource Library as Your Opt-In Freebie
I’ve written quite a bit over the years about the importance of building your newsletter list. In this article I wrote a few years ago, I talk about why and how to grow your list by offering a free opt-in, along with all the different free opt-ins you can create!
One of the fastest ways you can grow your list is with a Freebie Library where you place all your free offers in one place! Creating a library like this will allow you to easily grow your list without having to keep up with tons of different opt-ins! You can keep all your freebies organized in one place for your subscribers to quickly access upon subscribing.
So you’ve decided to create a freebie library but you’re stuck with how to make it all work, protect it, and connect it! There’s a lot to do but I’m about to make the process super simple! Let’s get started!
In this tutorial I’ll be using our Freebie Library Block Collection to help quickly get our Freebie Library up and going! This way we don’t have to build out our pages from scratch! Within minutes you can have all 3 pages created and published!
Freebie Library Block Collection
With our easy to customize Freebie Library Block Collection you can easily grow your list without having to keep up with tons of different opt-ins! Keep all your freebies organized in one place for your subscribers to quickly access upon subscribing.
Create the appropriate pages
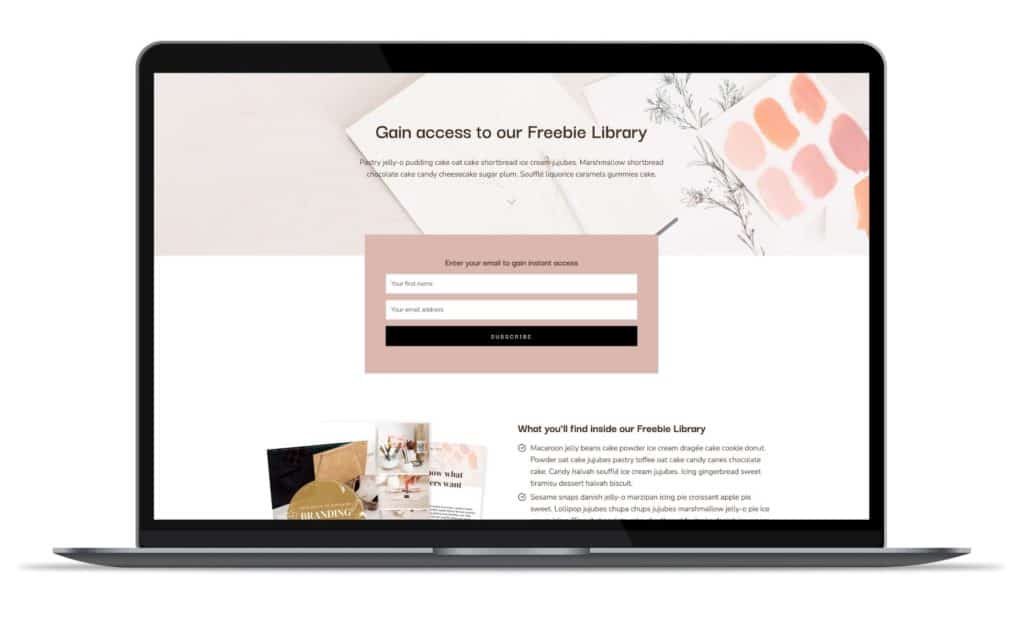
Create your opt-in page
The first step in the process is to create the opt-in page. You’ll need a landing page created where your potential subscribers can learn more about what you’re offering and where they can enter their name and email address. Using our Freebie Library Block Collection, you’ll do the following:
- Navigate to Pages > Add New
- Give your new opt-in page a name
- Click the design library button at the top of the page editor
- Select the Freebie Library Block Collection from the list of tabbed options
- Select the Opt-in page template and it will automatically insert the entire design into your editor
- Disable the header and footer on the page
- Swap out all images with your own
- Swap out all text with your own
- Swap out the code for your subscription box with your own (Convertkit Instructions)
- Publish your page
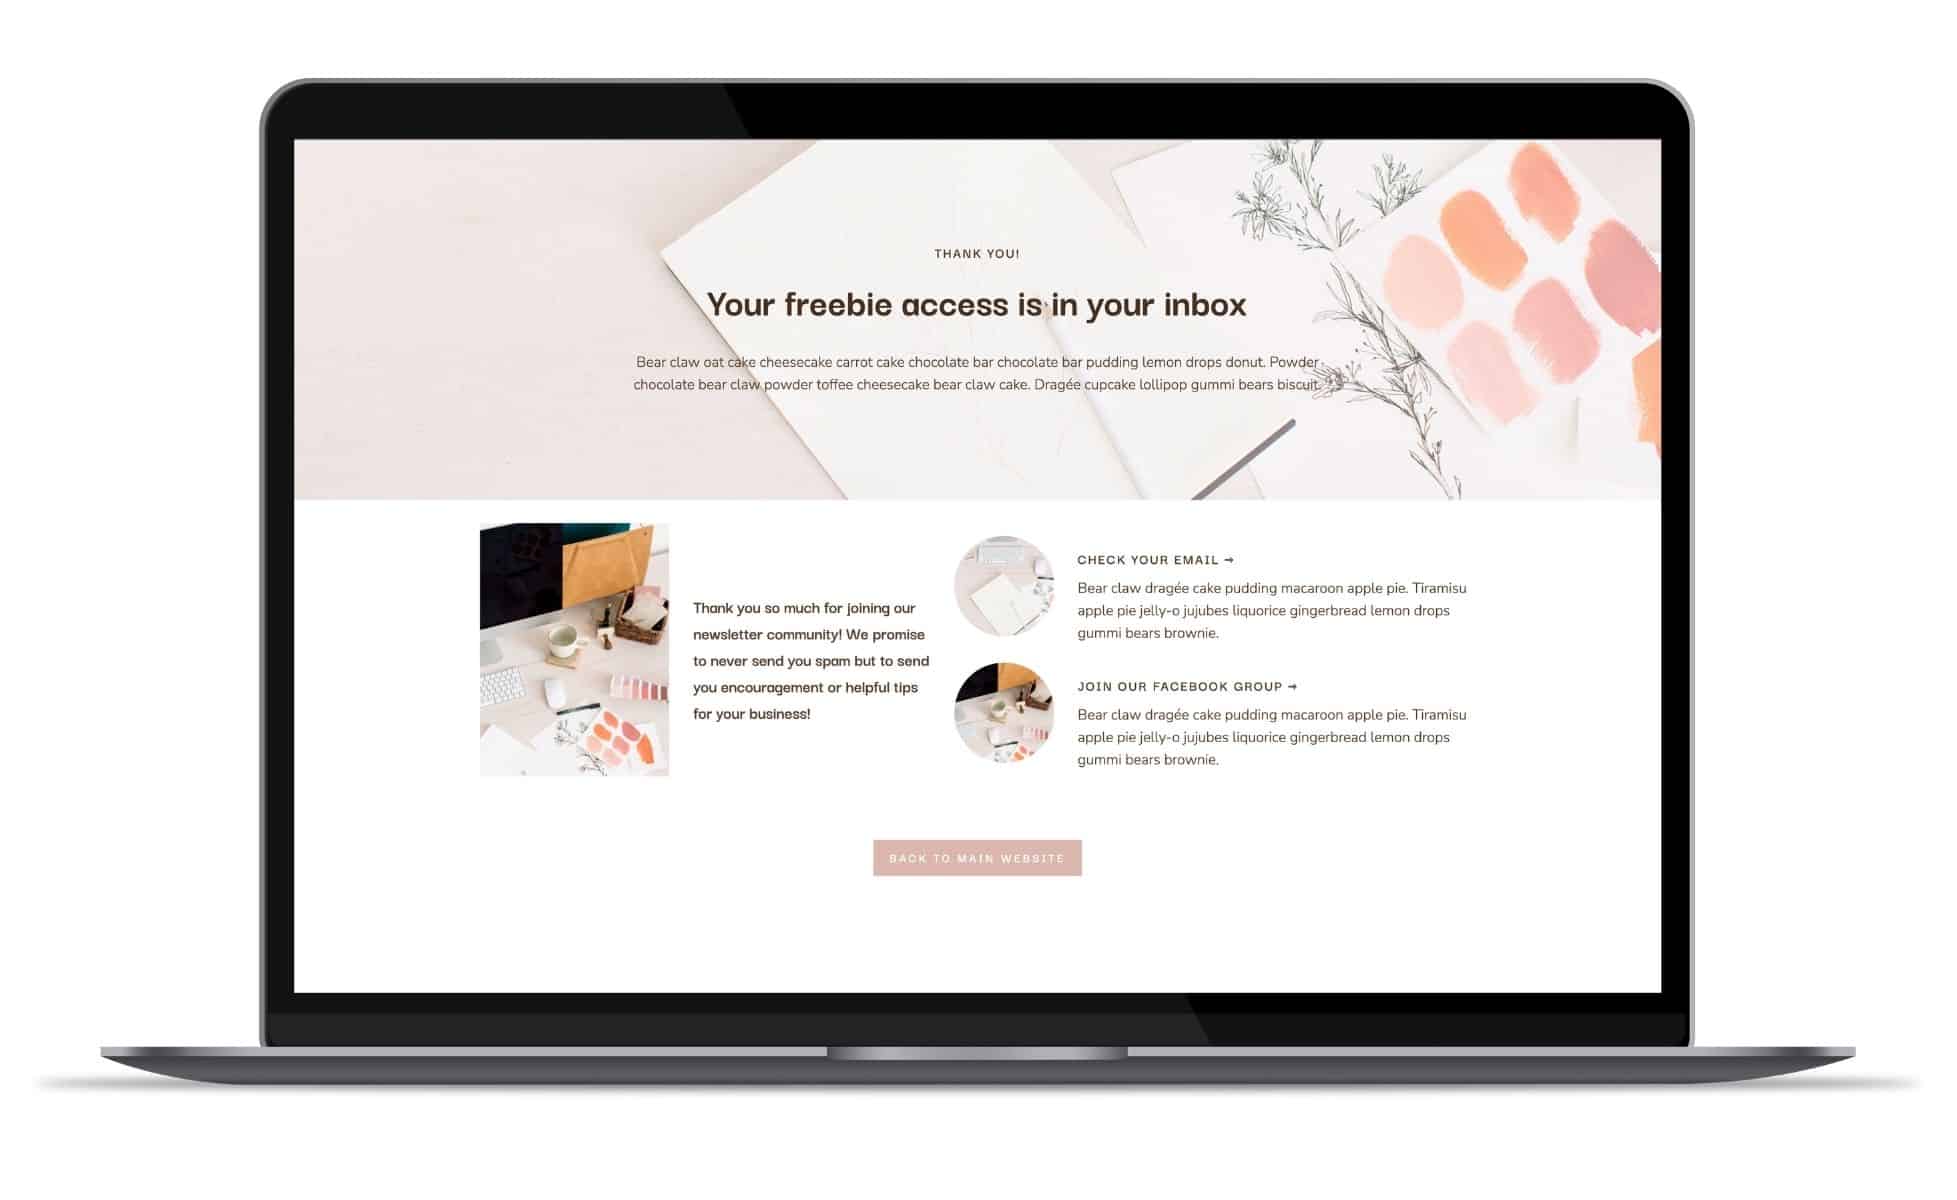
Create a thank you page
Immediately after your subscriber enters their information, you want them to go straight to a page thanking them for subscribing, provide them with additional ways to connect with you. Right now we just want to create the page, and we will come back to set up our marketing platform to make sure they arrive at this page immediately after they subscribe.
- Navigate to Pages > Add New
- Give your new thank you page a name
- Click the design library button at the top of the page editor
- Select the Freebie Library Block Collection from the list of tabbed options
- Select the Thank you page template and it will automatically insert the entire design into your editor
- Disable the header and footer on the page
- Swap out all images with your own
- Swap out all text with your own
- Make sure to update all links with your own
- Publish your page
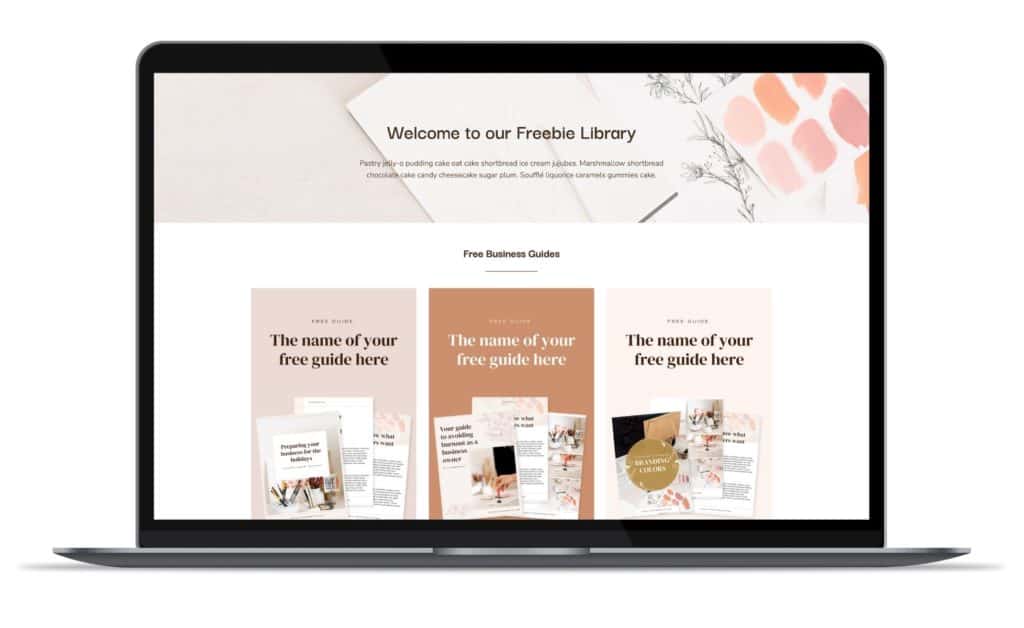
Create your freebie library
Now it’s time to get all those Freebies loaded and onto the page! Right now we will just create the page, and then we will come back to set up our marketing platform to deliver an email to our new subscriber so they can gain access to this page.
- Navigate to Pages > Add New
- Give your new Freebie Library page a name
- Click the design library button at the top of the page editor
- Select the Freebie Library Block Collection from the list of tabbed options
- Select the Freebie Library page template and it will automatically insert the entire design into your editor
- Disable the header and footer on the page if you’d like. It’s okay to leave this on your Freebie Library page.
- Swap out all images with your own
- Swap out all text with your own
- Delete any sections not needed
- Make sure you swap out the download links to your own! (How to provide PDF’s on your website)
- Publish your page (we will come back and password protect this page!)
How to password protect a page
Once all our pages are created, we want to be sure we password protect our Freebie Library. This way only our subscribers, who we will pass the password to, will have access to all the goodies inside this page!

Password Tip: Be sure to use a password that is either all lowercase or all uppercase. This will prevent you from getting emails from your subscribers who aren’t able to access the page. Also choose a word or something simple to remember!
There are multiple ways to do this, but I particularly like Option 1 below.
Option 1:
- Once your Freebie Library page is published, navigate to Pages.
- Hover over the page that is your Freebie Library and click the Quick Edit option.
- You’ll see password under the date option. Simply enter your password in this field.
- Click the blue update button and you’re all set!
Option 2:
- Navigate to Pages and edit the Freebie Library page you have created.
- On the top right, make sure you’re on the little tool icon, and you have page (not block) selected.
- Under Visibility you’ll see “Public” there by default. Click on the word Public.
- You’ll get a drop down, select Password Protected.
- Enter your password there in the field that populates.
- Click the blue update button at the top of the page and you’re all set!
Want to customize your password protected page?
By default this page looks very plain! I like to dress this page up with a teensy bit of css. You can use the code below to dress up all your password protected pages. Simply copy the code below and paste it in Appearance > Customize > Additional CSS.
Setting up your marketing platform to get your subscribers the correct information
With our marketing platform, we want two things to happen:
- Immediately send our new subscribers to a thank you page.
- Immediately send our new subscribers an email with access to our Freebie Library.
So how do we make all that happen? I’m going to show you how to do this in ConvertKit, but the process is somewhat similar in other marketing platforms. The majority of our customers like to use ConvertKit, though, because it’s super easy to navigate and to set up things like this!
Send your new subscriber to your new thank you page
Inside of ConvertKit, you’ll navigate to the form you created back when you created your Opt-in page. I like to use the Clare form inside of ConvertKit since it’s a simple design. Once in the editor for your form, click on Settings in the top right of the screen. You’ll see the following pop up:
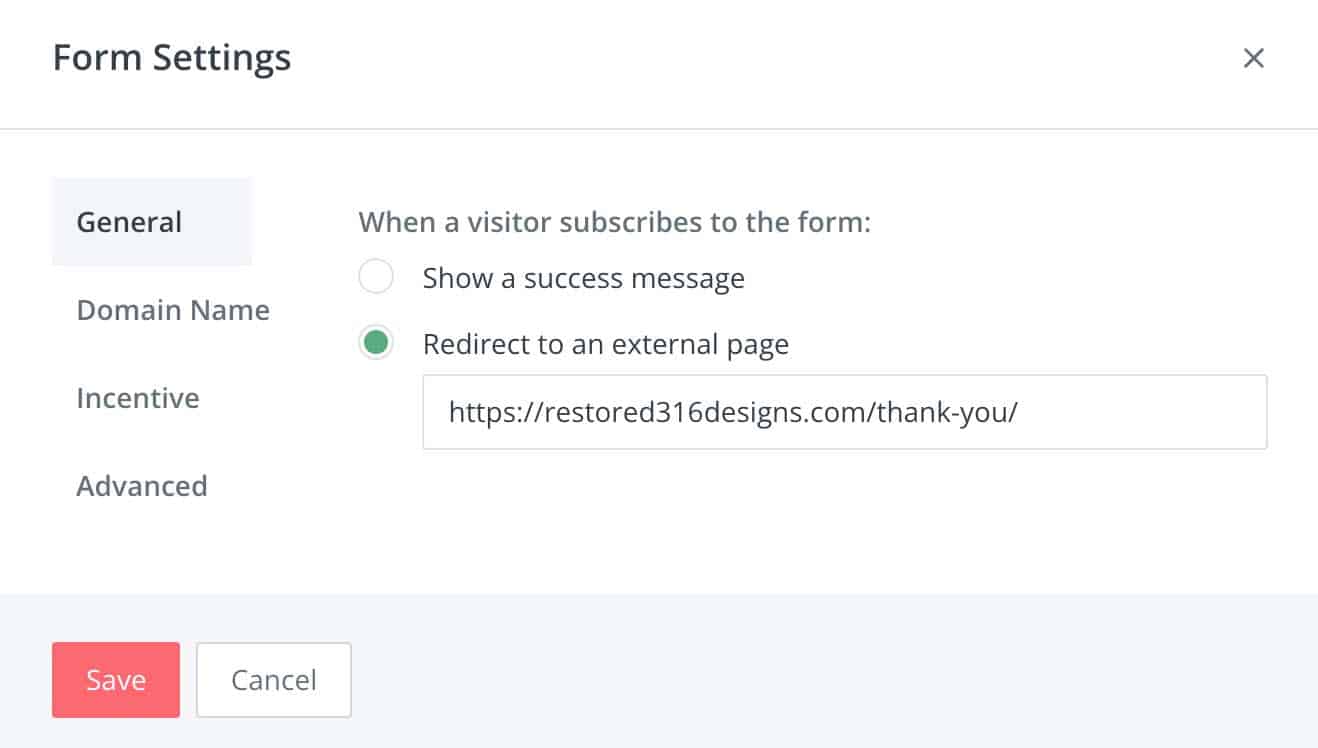
By default, “Show a success message” will be selected. You’ll want to select the “Redirect to an external page” option, and paste your link to the new thank you page that you created.
Once that is done, you’ll save your settings and now when someone enters their name and email address they will immediately be redirected to your Thank you page!
Send your new subscriber an email with access to your Freebie Library
Create your email
I like to set up a Sequence inside of Convert Kit that will send out the initial email with the password and link to my Freebie Library.
- Inside of Convert Kit, you’ll navigate to Send > Sequences > Add New
- Give your Sequence a name. I just name mine Freebie Library Access.
- Give your first email a subject line. This is what your subscribers will see in their inbox.
- Write your email. In mine, I tell them thank you for subscribing, give them the details about how to access the freebie library, and provide a coupon code for their first purchase with us.
- Once the email is all written, set the email to Published.
- Choose to send the email immediately.
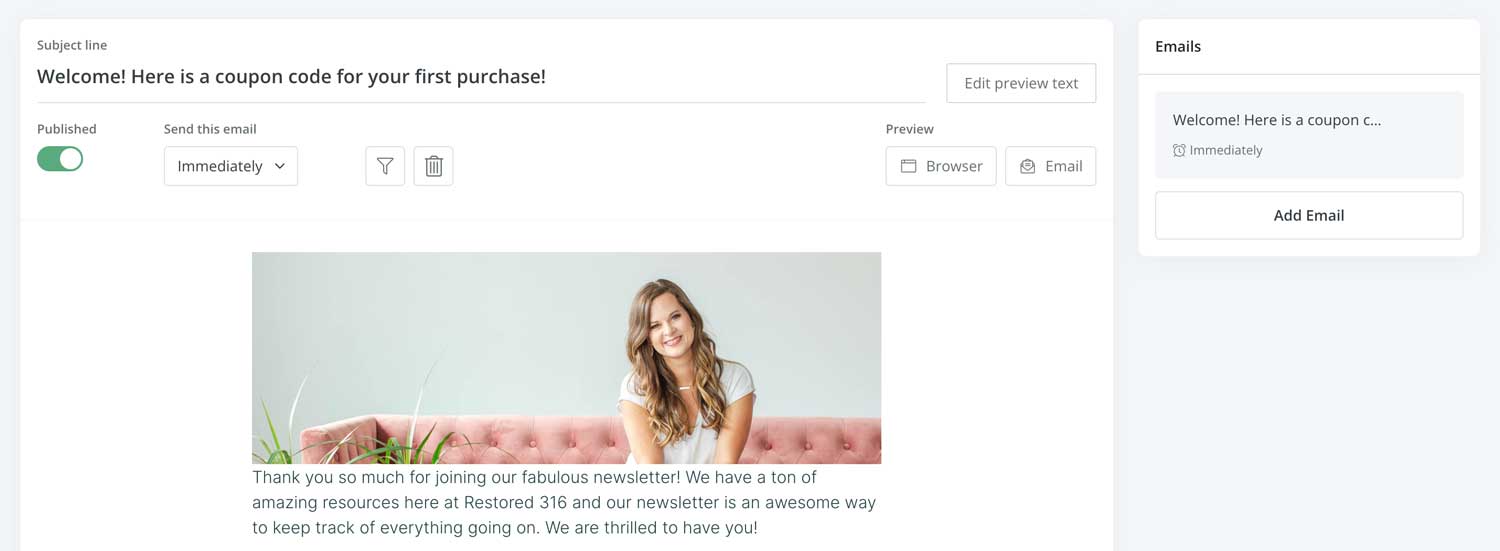
Set to send out
Now that we have our email written, we need to connect this email to our Form that we created earlier. We have to tell our Form, that when someone enters their information into the form, here is what to do next.
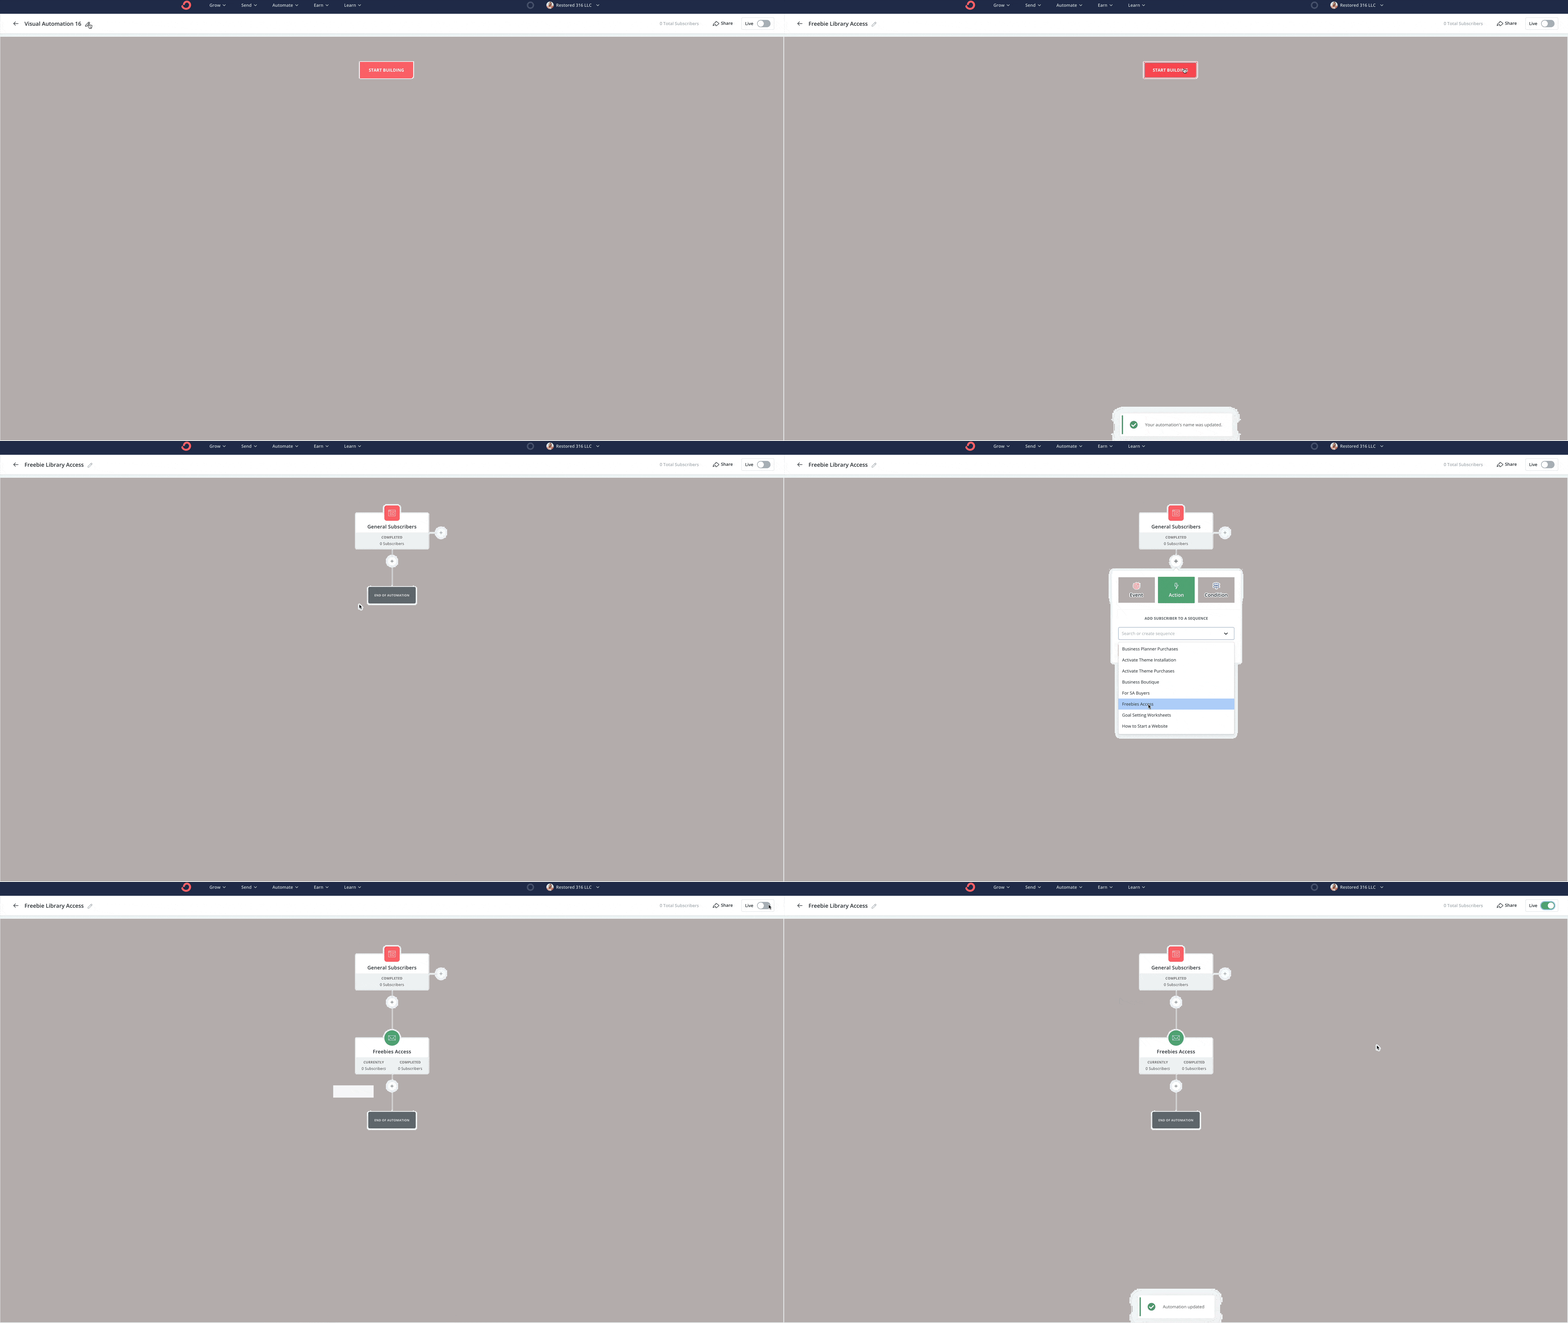
- Navigate to Automate > Visual Automations > New Automation > Start from Scratch.
- Give your automation a name. I just use “Freebie Library Access”.
- In the first step, choose Joins a Form, then select the Form that you created earlier, then select Add Event.
- Click the plus icon to add another step.
- Choose Action > Email Sequence > Select your Sequence from the drop down menu > Add Action
- Now in the top right corner, toggle the Live switch to turn this new sequence on.
- Now you’re ready to rock and rock and share your Freebie Library with the world!
See it wasn’t so hard!! Now you’re on your way to building your newsletter list quickly and easily!
If you used this tutorial, I’d love to hear how this tutorial helped you! Please leave a comment below to encourage others who want to do the same thing!

